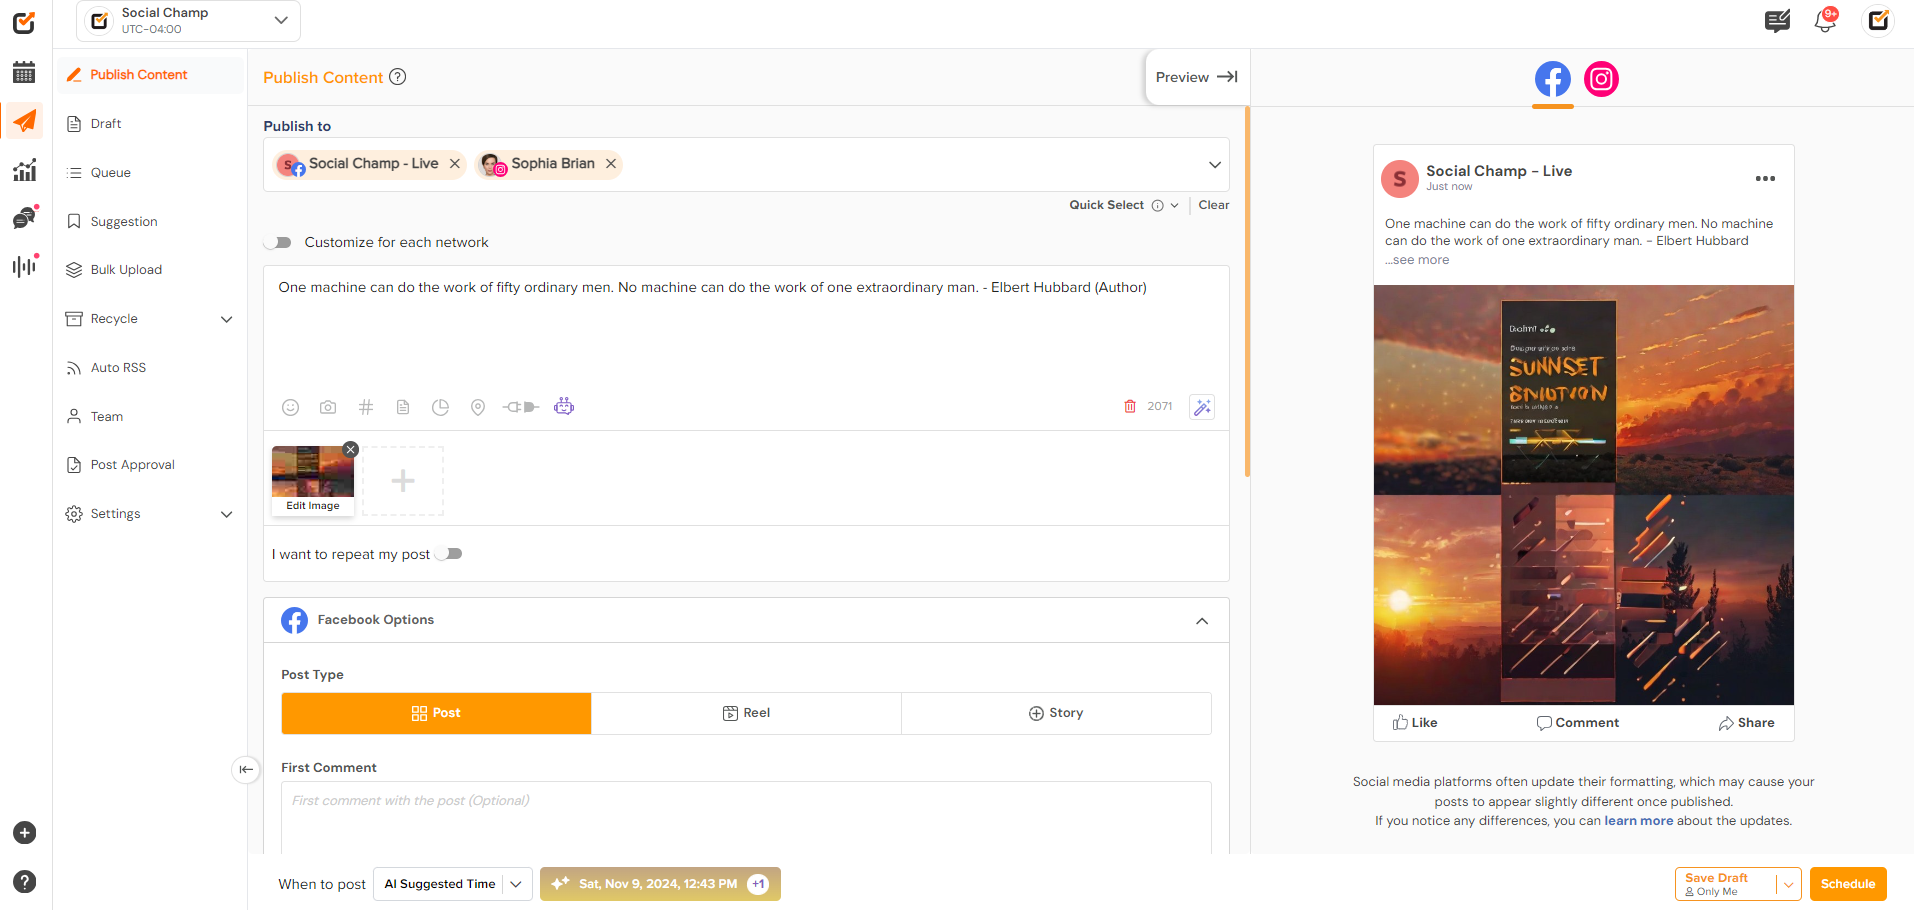
Social Champ’s AI features, part of the AI Champ suite, are designed to simplify social media management, allowing you to create, optimize, and schedule content efficiently. Social Champ AI Suite comprises of 4 main features,
- AI Content Wizard
- AI Imaginator
- AI Sentiment Analysis
- AI Suggested Time to Post
here’s how you can use each tool, step by step:
1. AI Content Wizard
Create engaging content effortlessly with AI Content Wizard. This tool helps you craft posts tailored to your audience, tone, and platform in seconds.
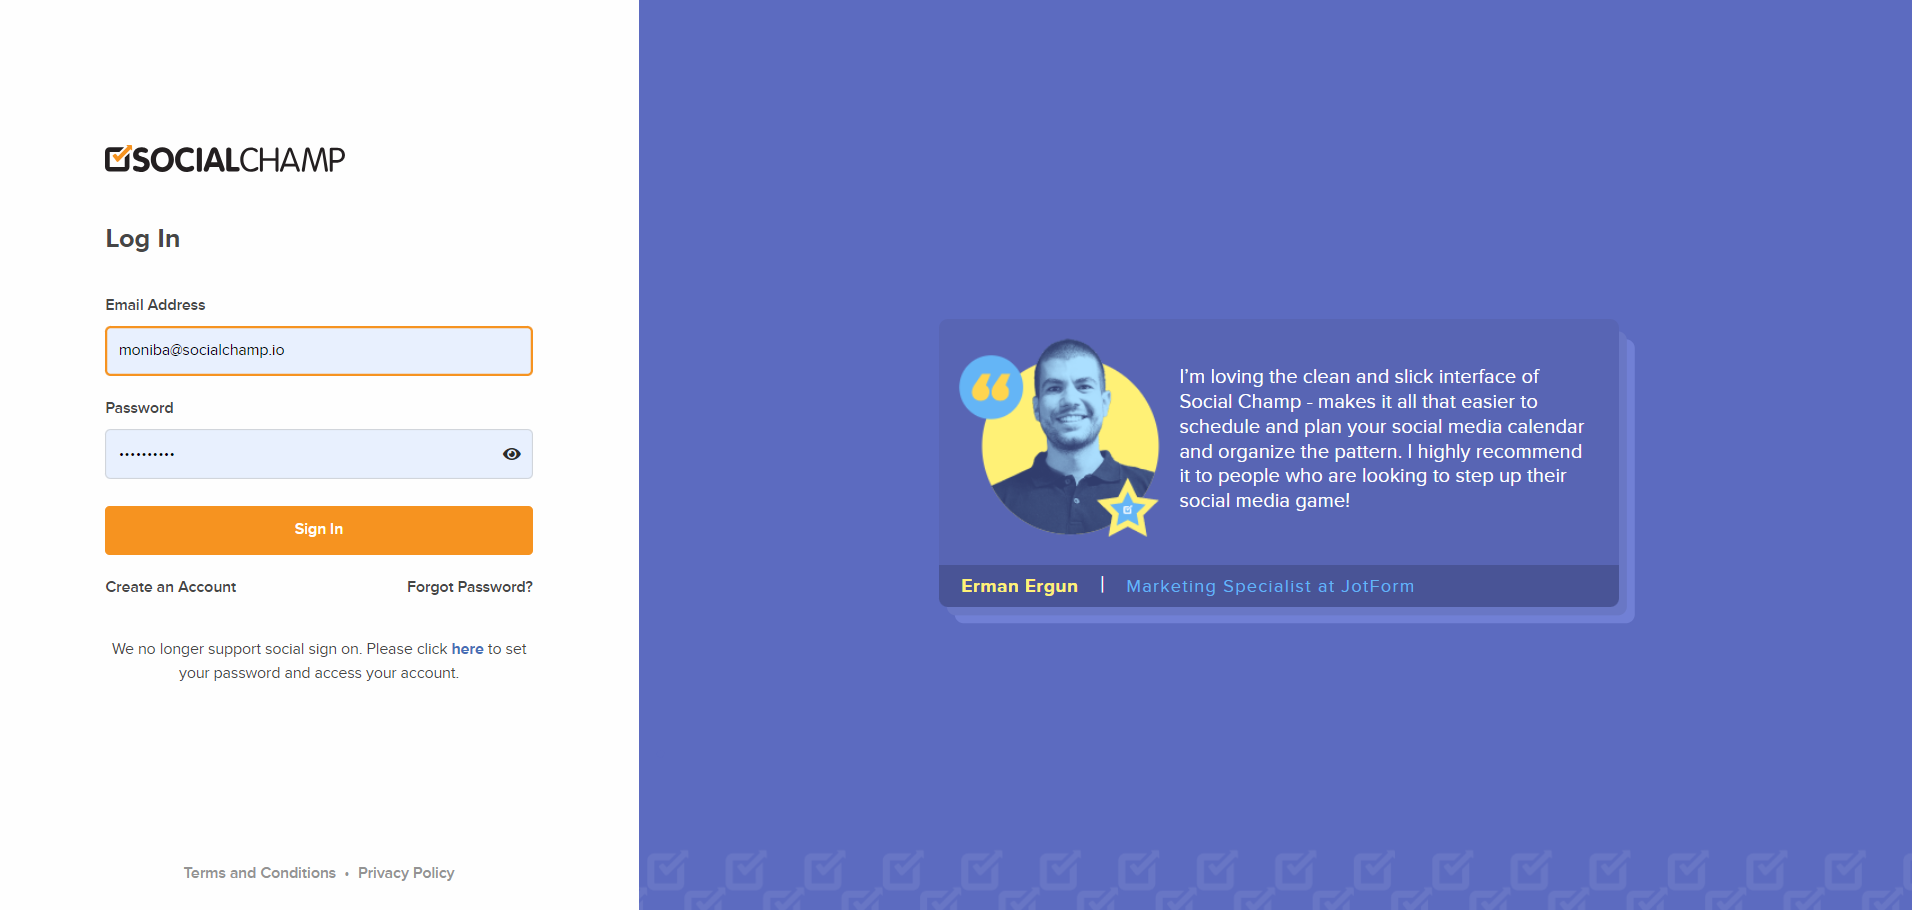
- Login to Social Champ: Access your Social Champ dashboard.
- Navigate to AI Content Wizard:
1. Go to the “Publish” section on the left-hand menu.
2. Click on the “AI Content Wizard” option.

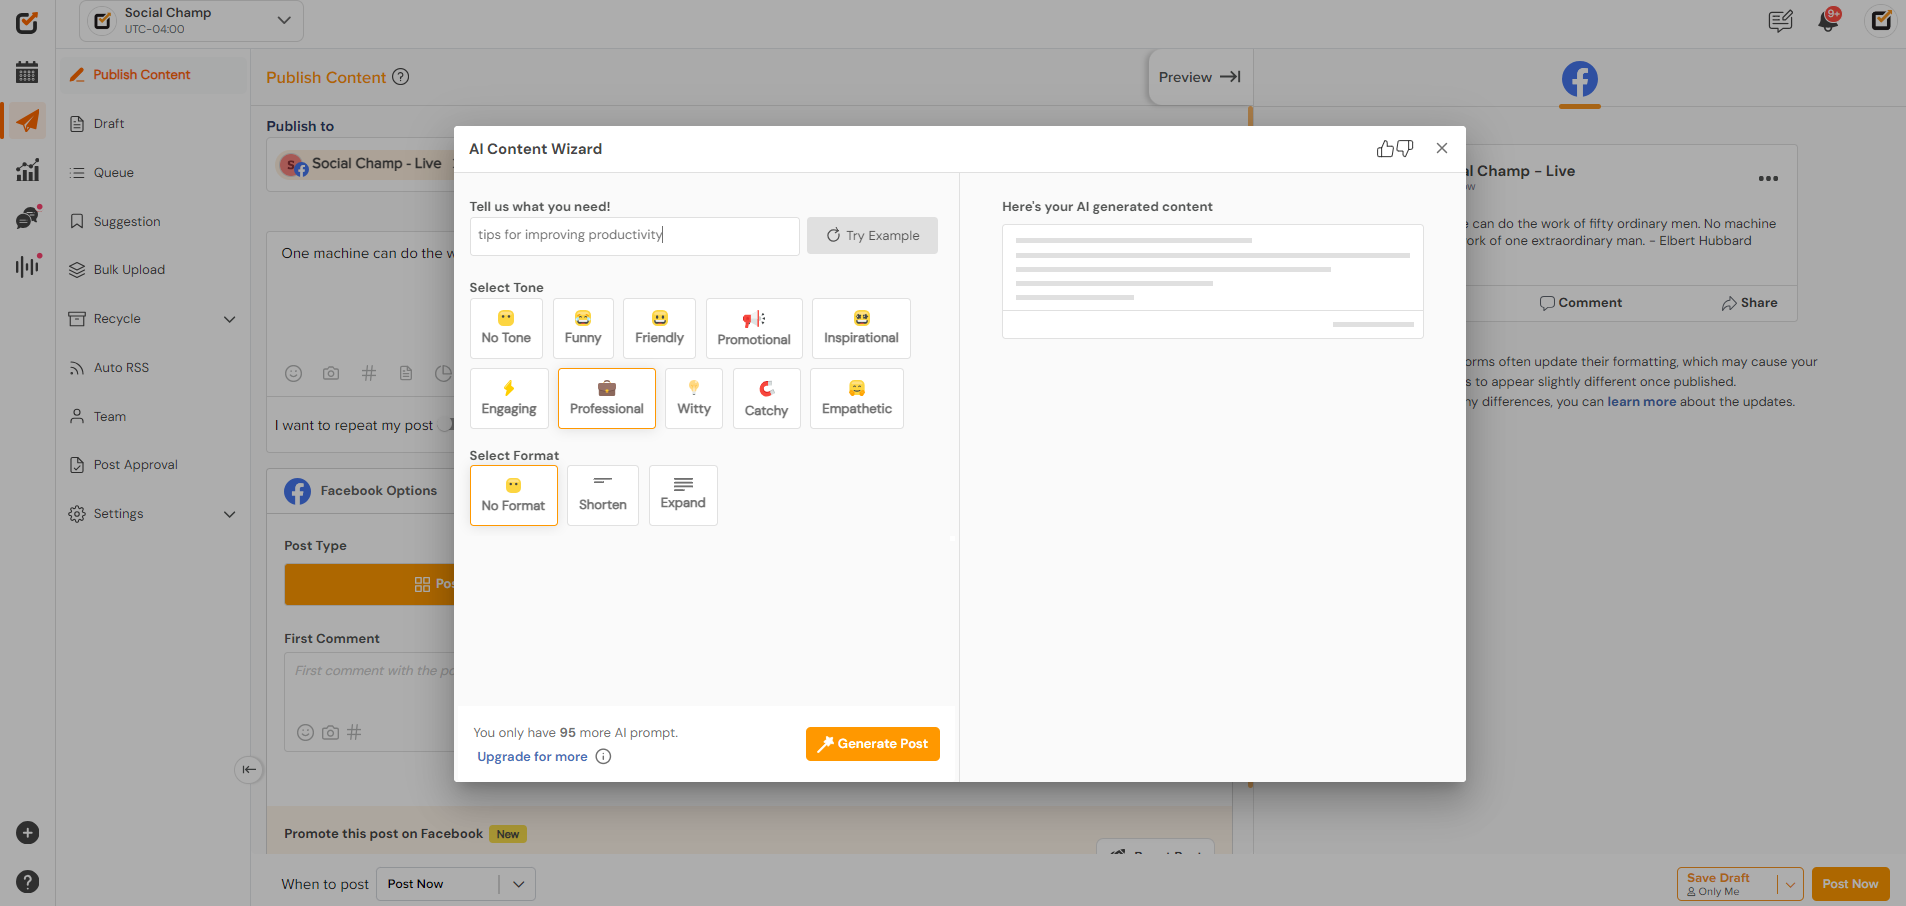
- Enter a Prompt or Keywords:
1. Provide a brief prompt or keywords related to the content you want to create (e.g., “tips for improving productivity”).
- Select a Tone:
1. Choose the tone that matches your brand’s style: Professional, Catchy, Empathetic, or any other available options. - Select Format:
1. Choose the format for the content as per your requirements. - Generate Content:
1. Click on “Generate” to let the AI create a draft post for you.
- Review and Send to Composer:
1. Review the content, and if everything looks good, click on the Send to Composer button to get started.

- Schedule or Publish:
1. Once you’re happy with the content, schedule it for a later date or publish it immediately by clicking the “Schedule” or “Post Now” button.

2. AI Imaginator
AI Imaginator helps you create visually appealing images for your posts without needing graphic design skills.
Steps to Use AI Imaginator:
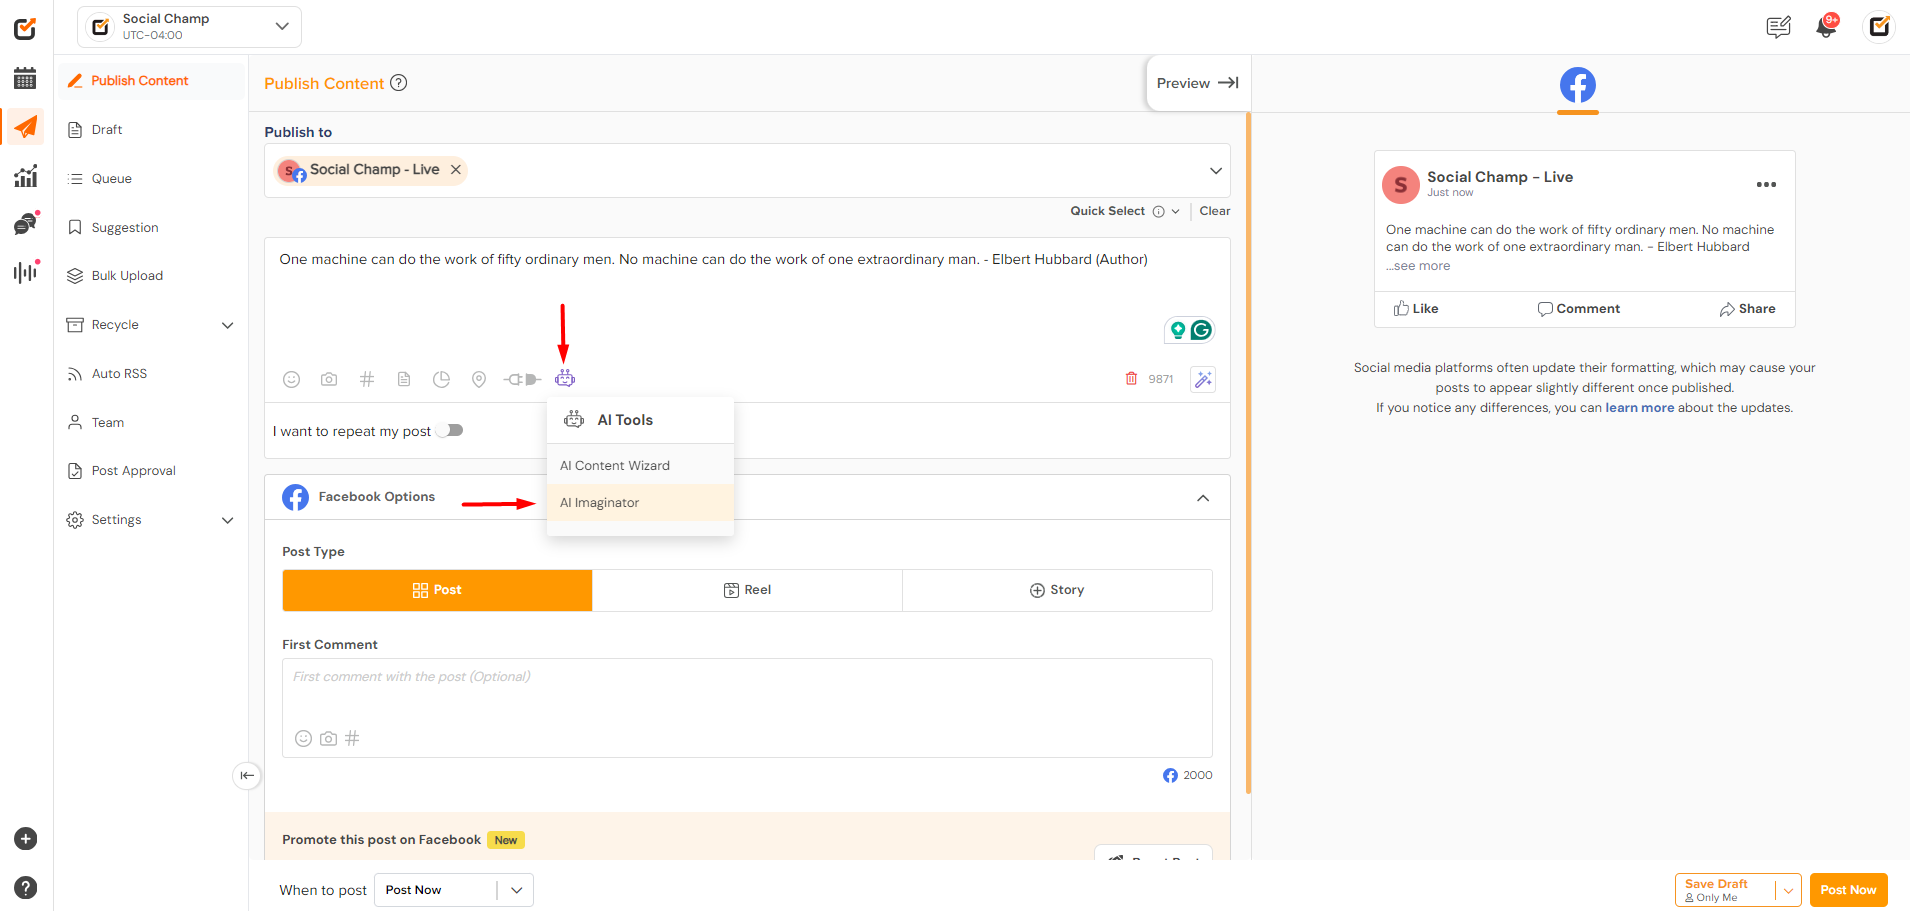
- Access AI Imaginator:
1. Go to your Social Champ dashboard.
2. Navigate to the “Publish” tab and select “AI Imaginator.”
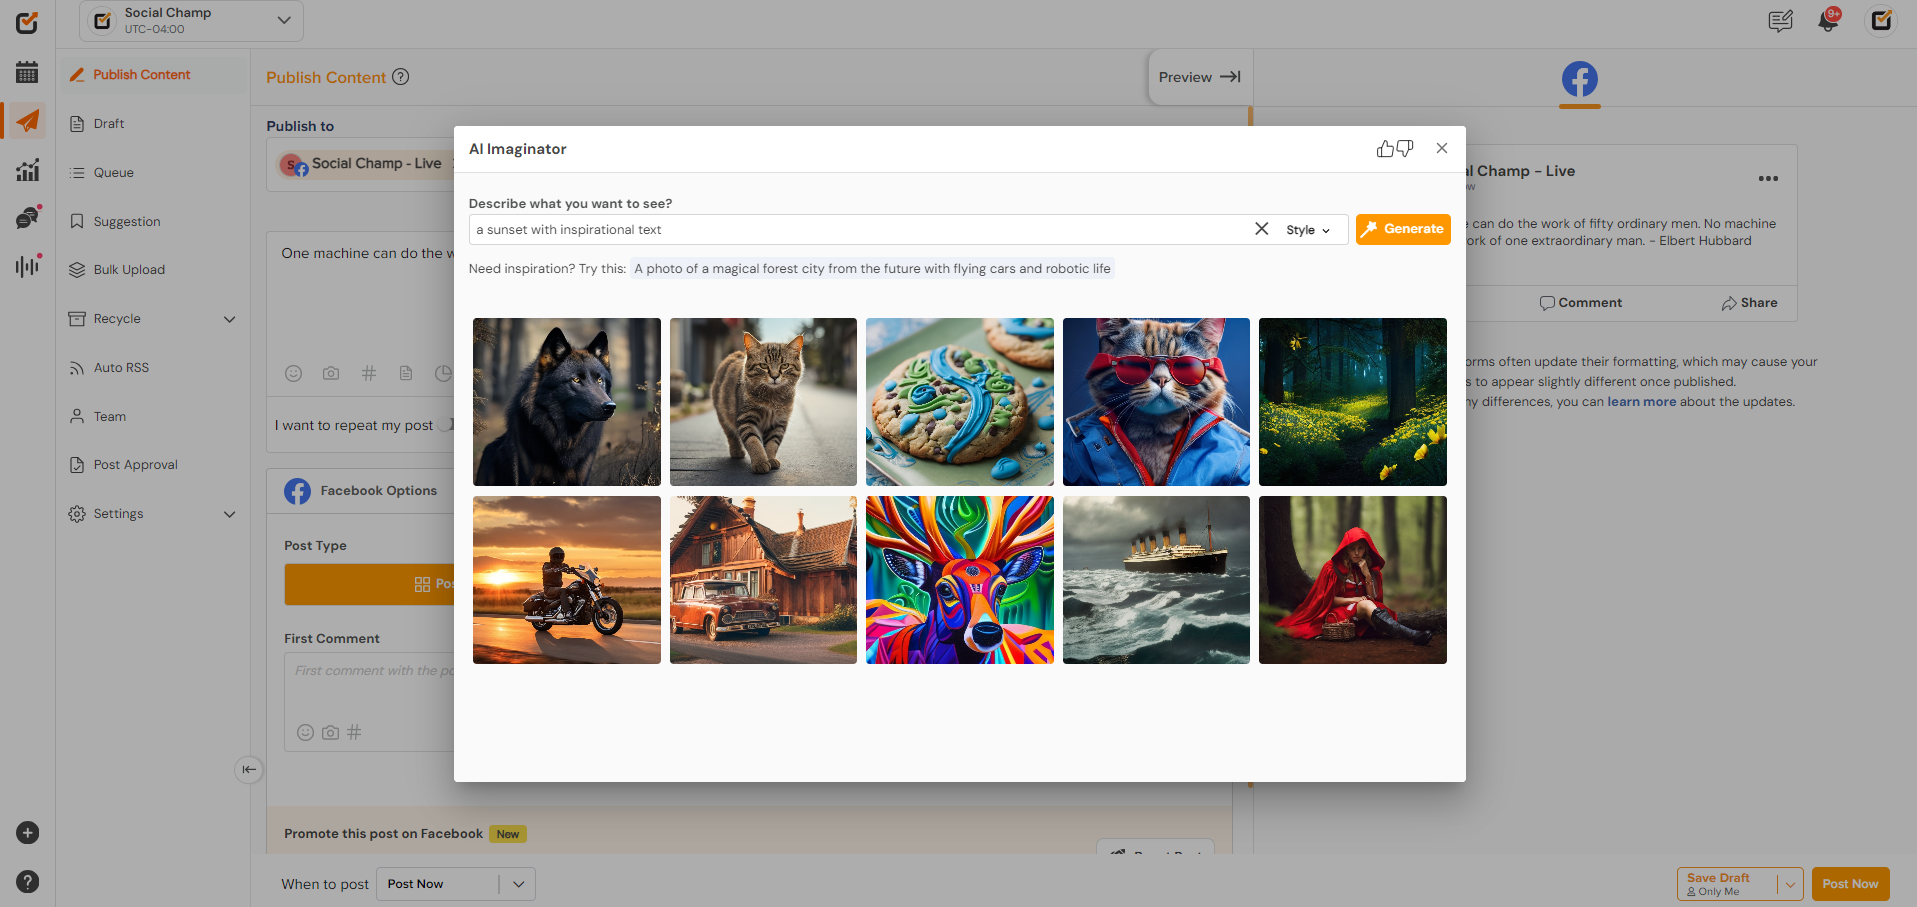
- Describe Your Image:
1. Enter a short description of the image you want to create (e.g., “a sunset with inspirational text”).
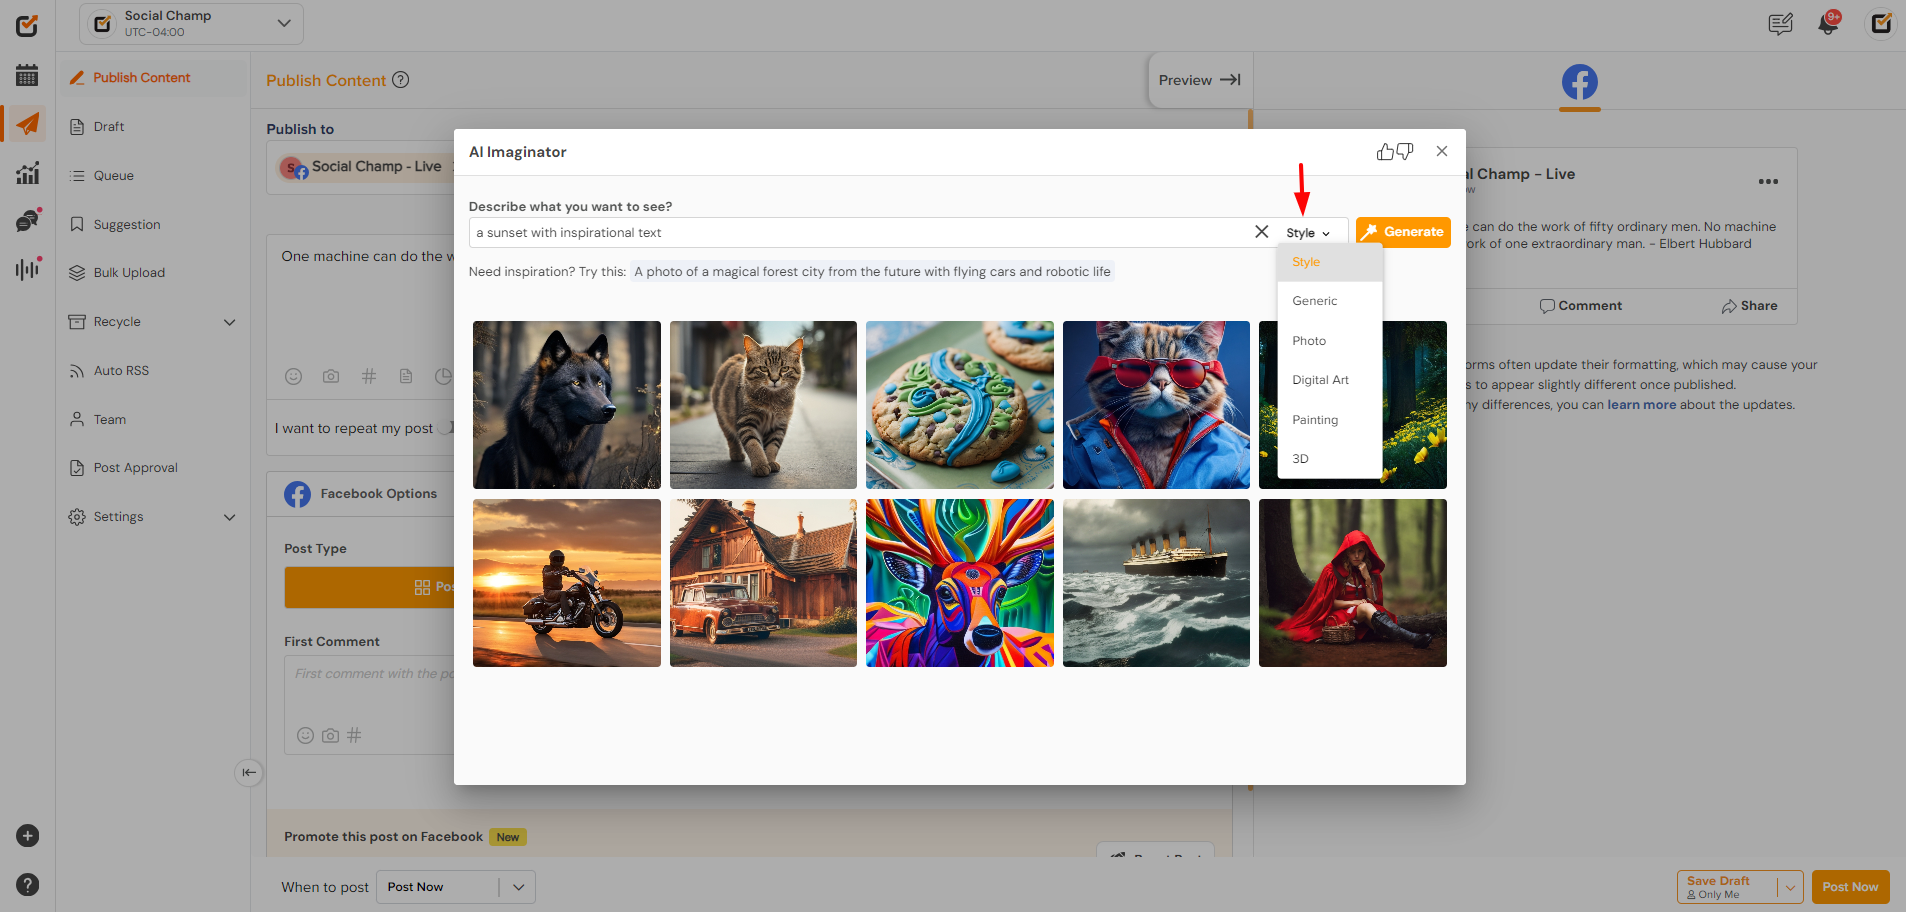
- Customize Your Design:
1. Choose from style options like “Generic,” “Photo,” “Painting” “3D,”or “Digital Art” to suit your post’s aesthetic.
- Generate the Image:
1. Click “Generate” and wait for the AI to create a visual based on your description.
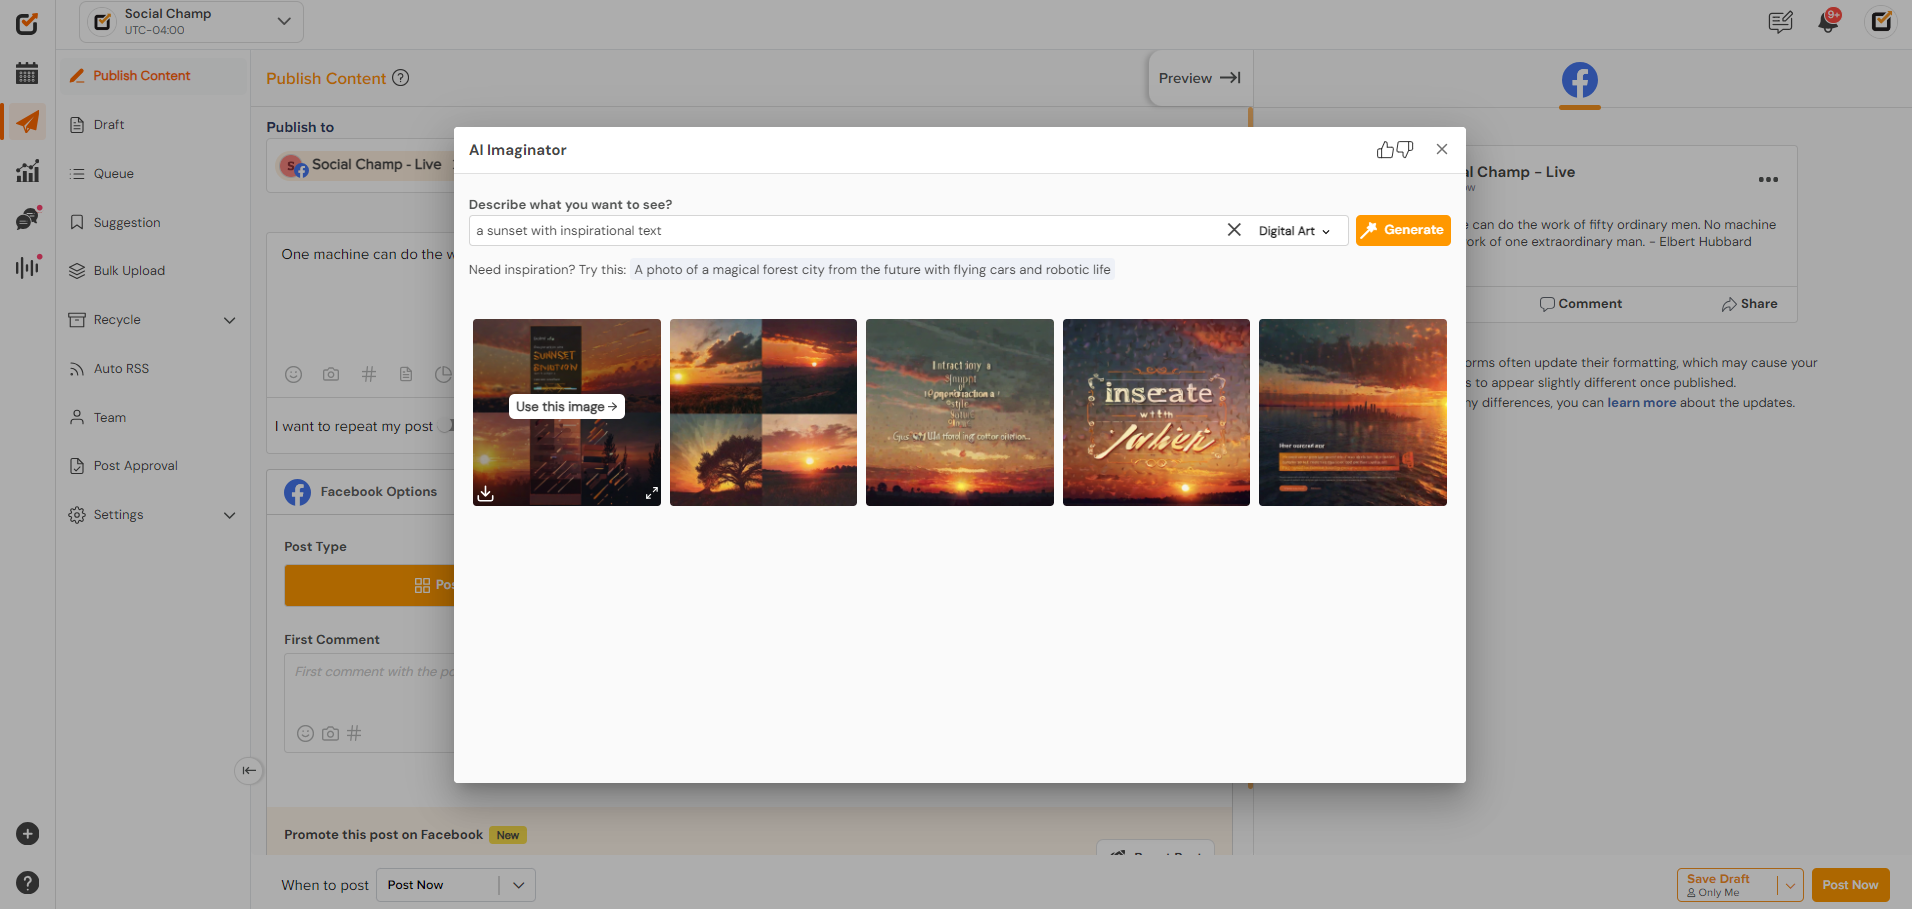
- Use Image:
1. If you are satisfied, click on the “use this image” for the desired image and It wil be uploaded to go along with your post.
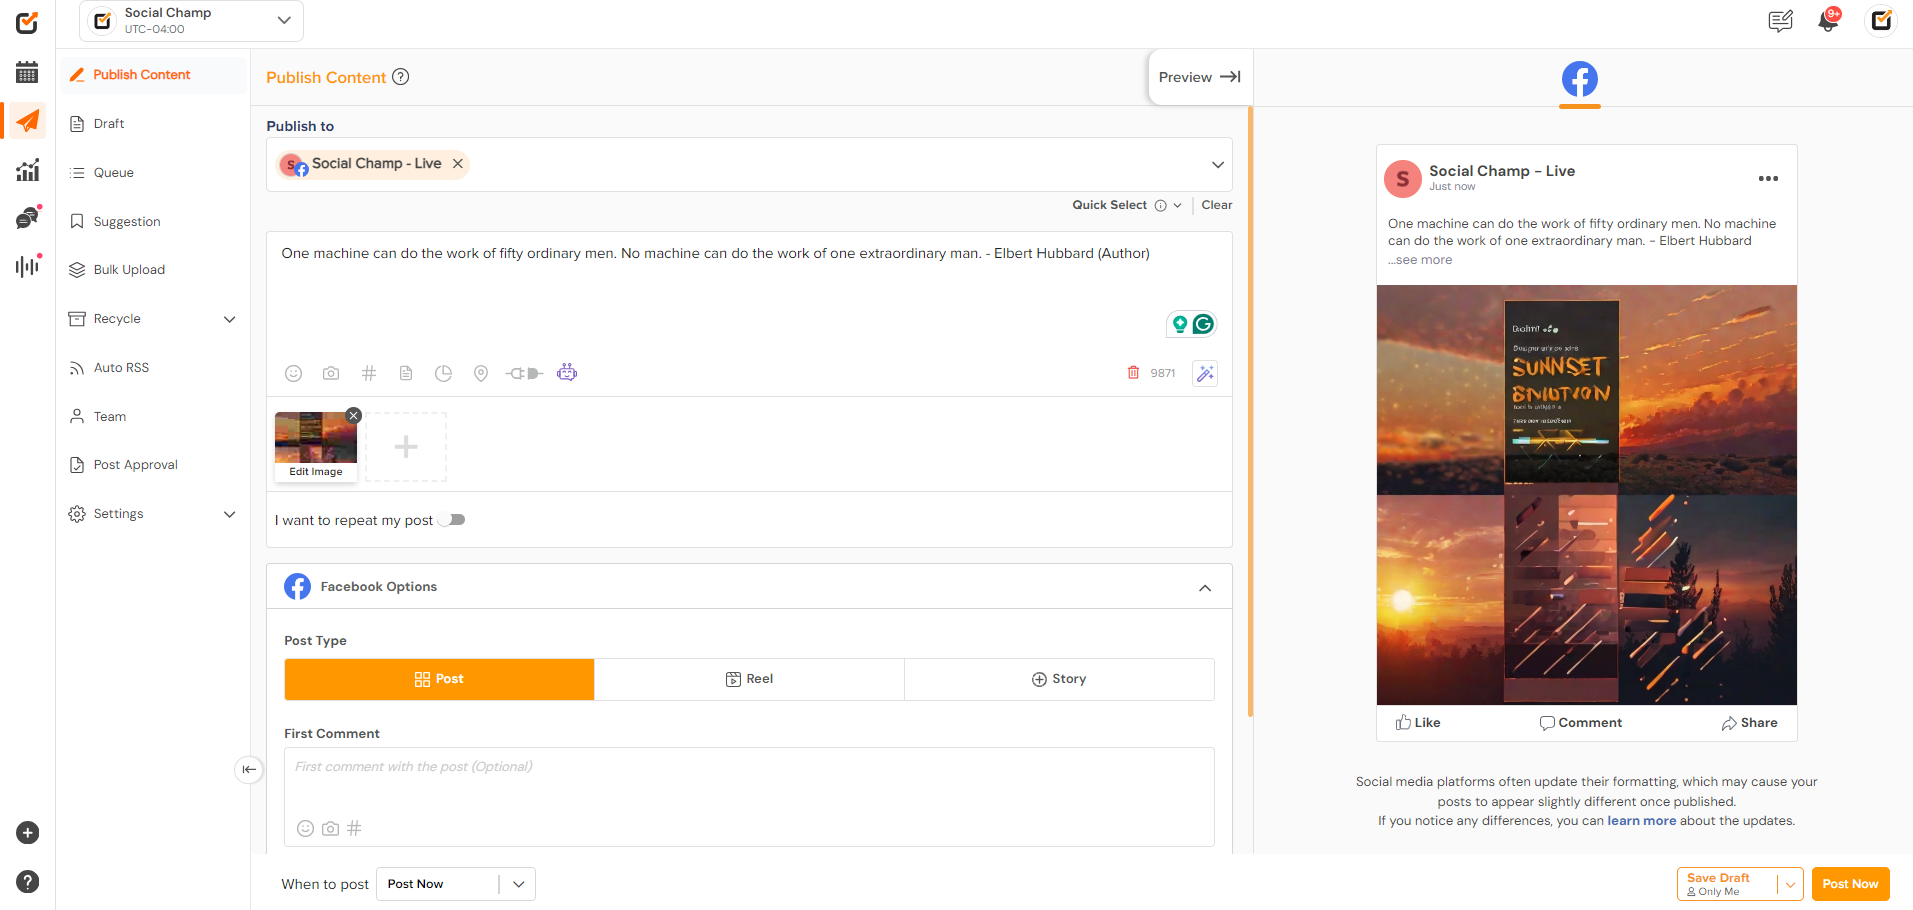
- Schedule or Publish:
1. Complete the post-creation process and choose to schedule or publish directly.
3. AI Sentiment Analysis
Ensure your posts convey the right tone and emotion with AI Sentiment Analysis.
Steps to Use AI Sentiment Analysis:
- Access Sentiment Analysis:
1. Login to your Social Champ account.
2. Go to the “Publish” tab and click on “AI Sentiment Analysis.”
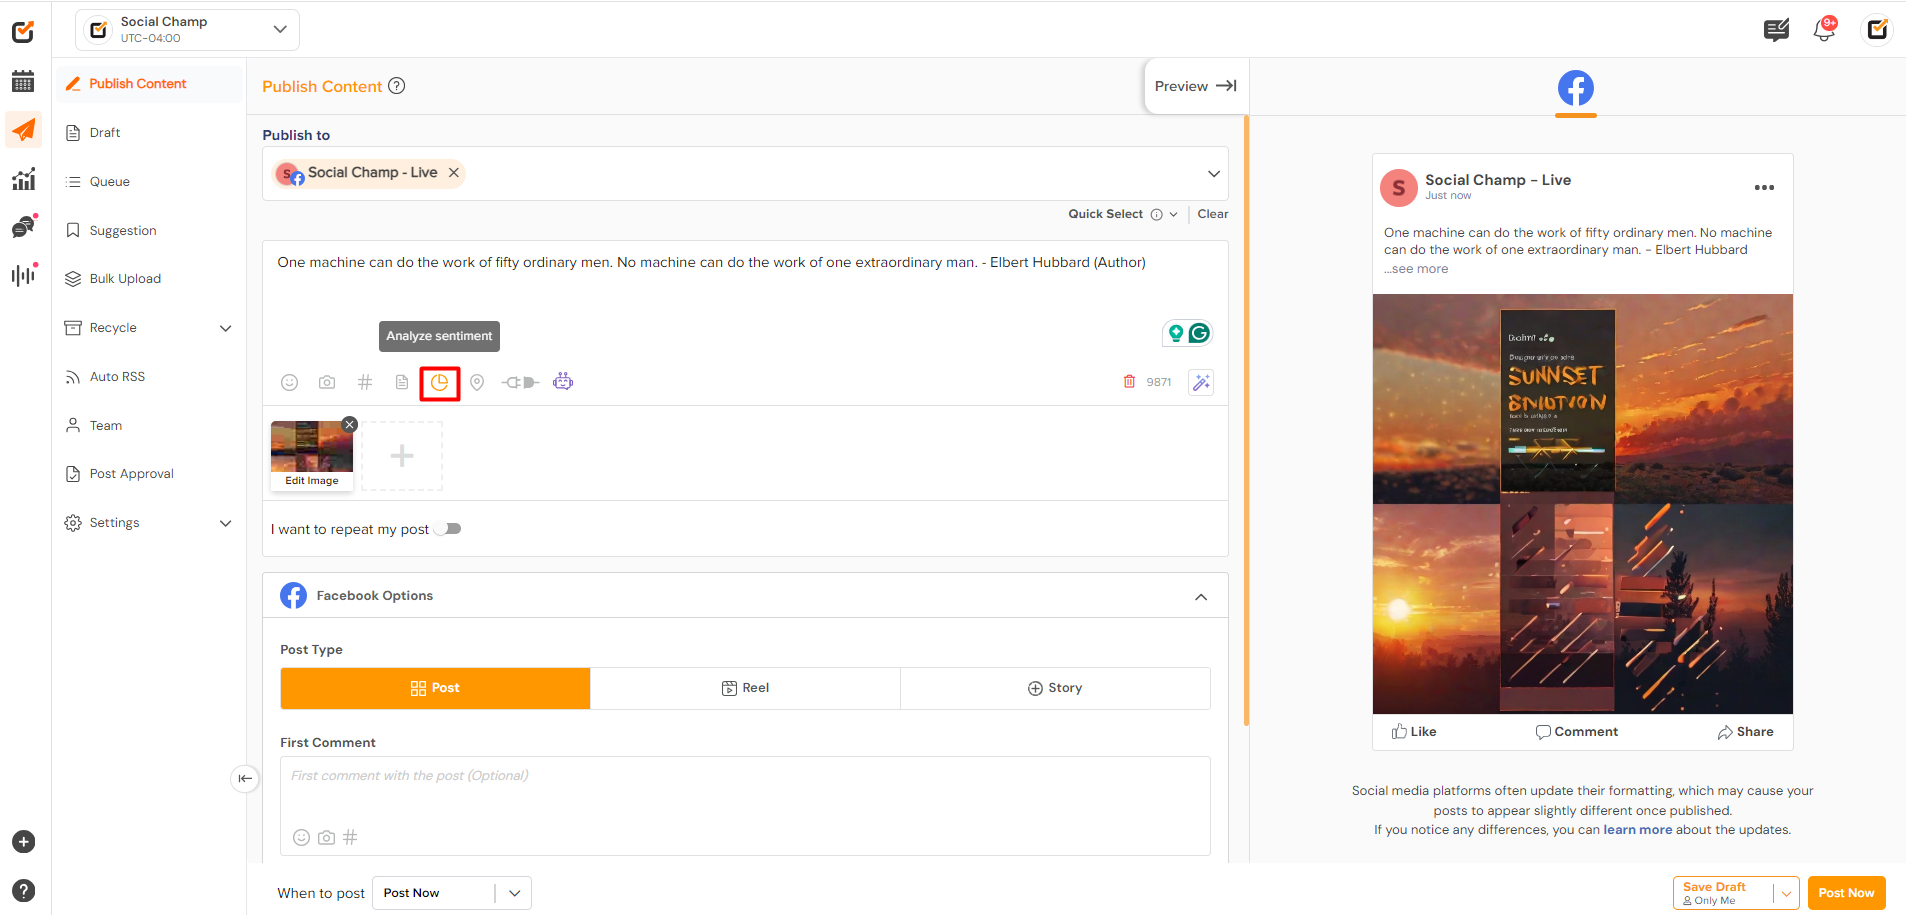
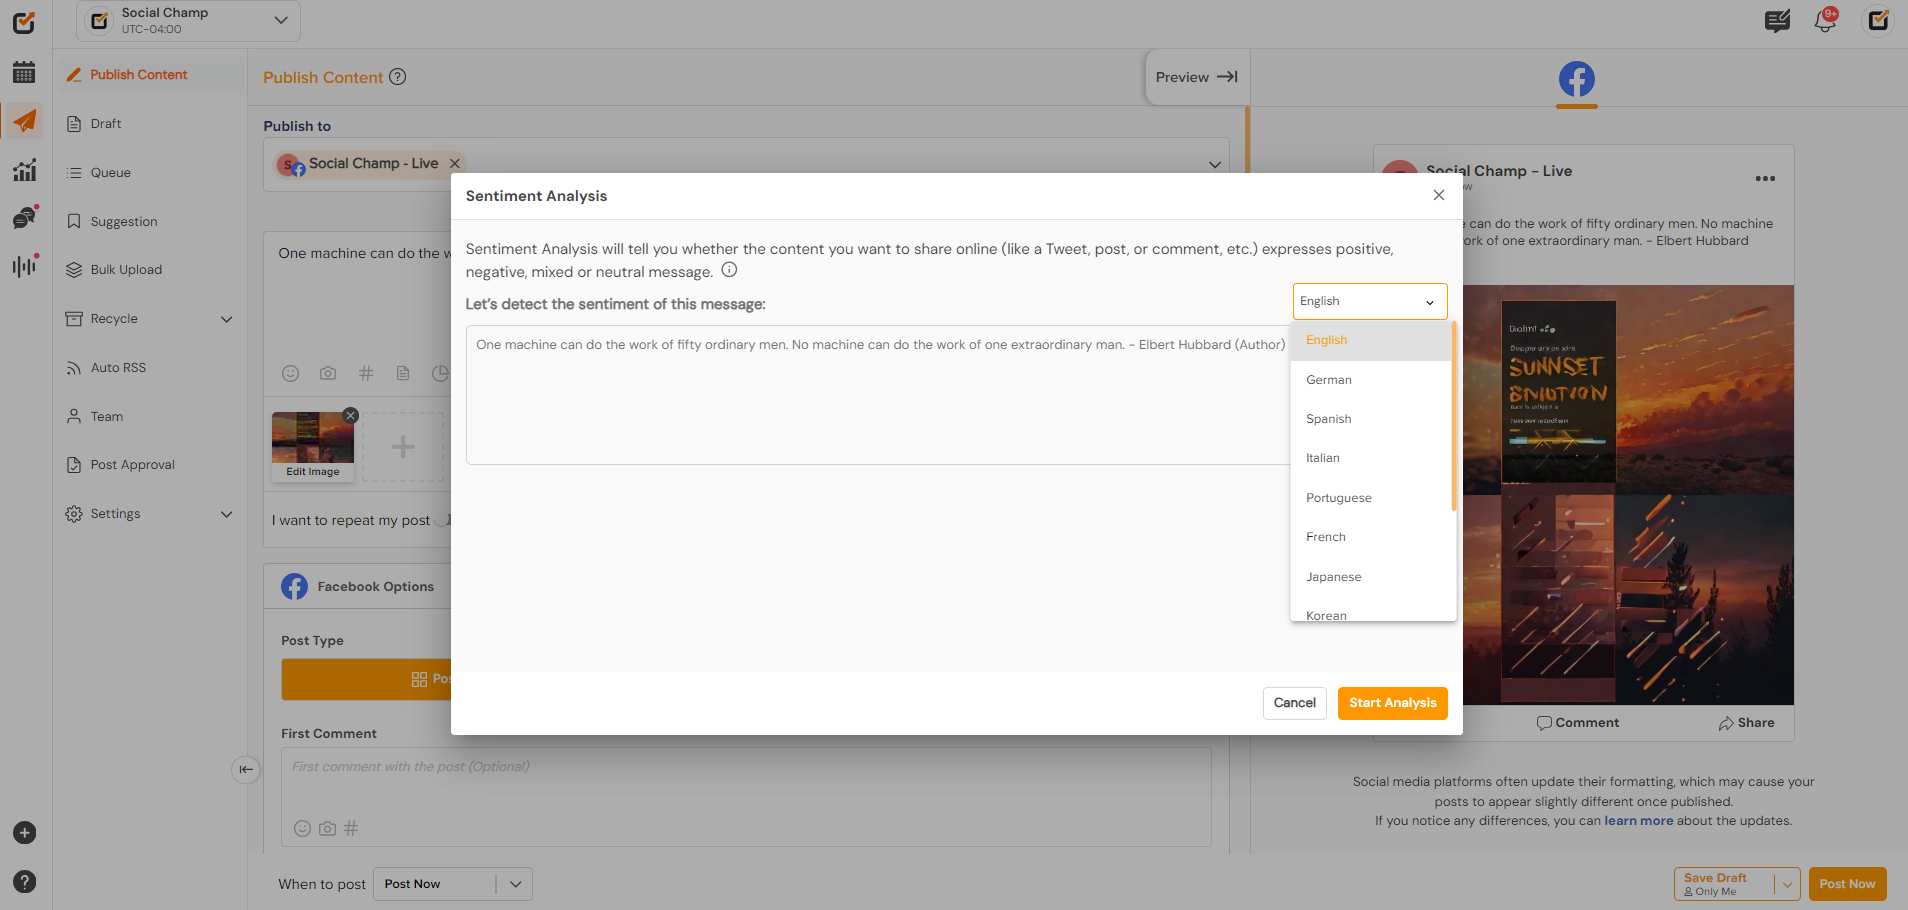
- Select language:
1. You can find different language options to choose from.
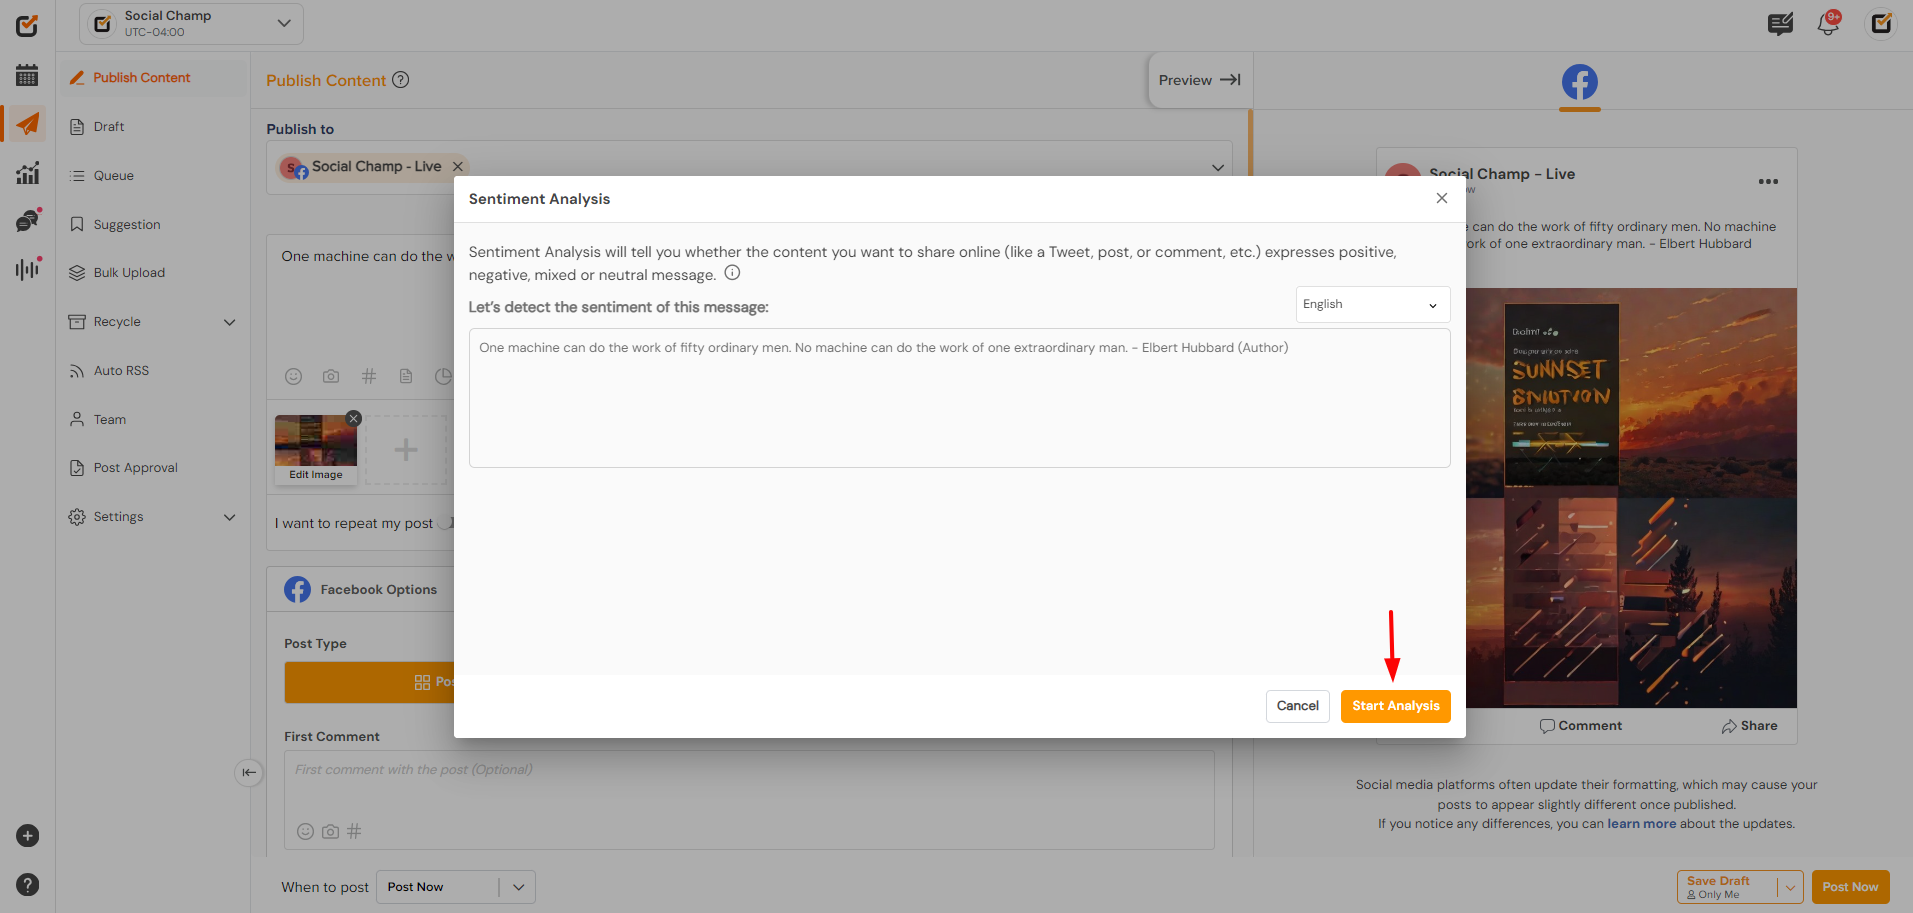
- Analyze Sentiment:
1. Click on “Analyze” to get a sentiment score and feedback on the tone (Positive, Neutral, Negative, Mixed).
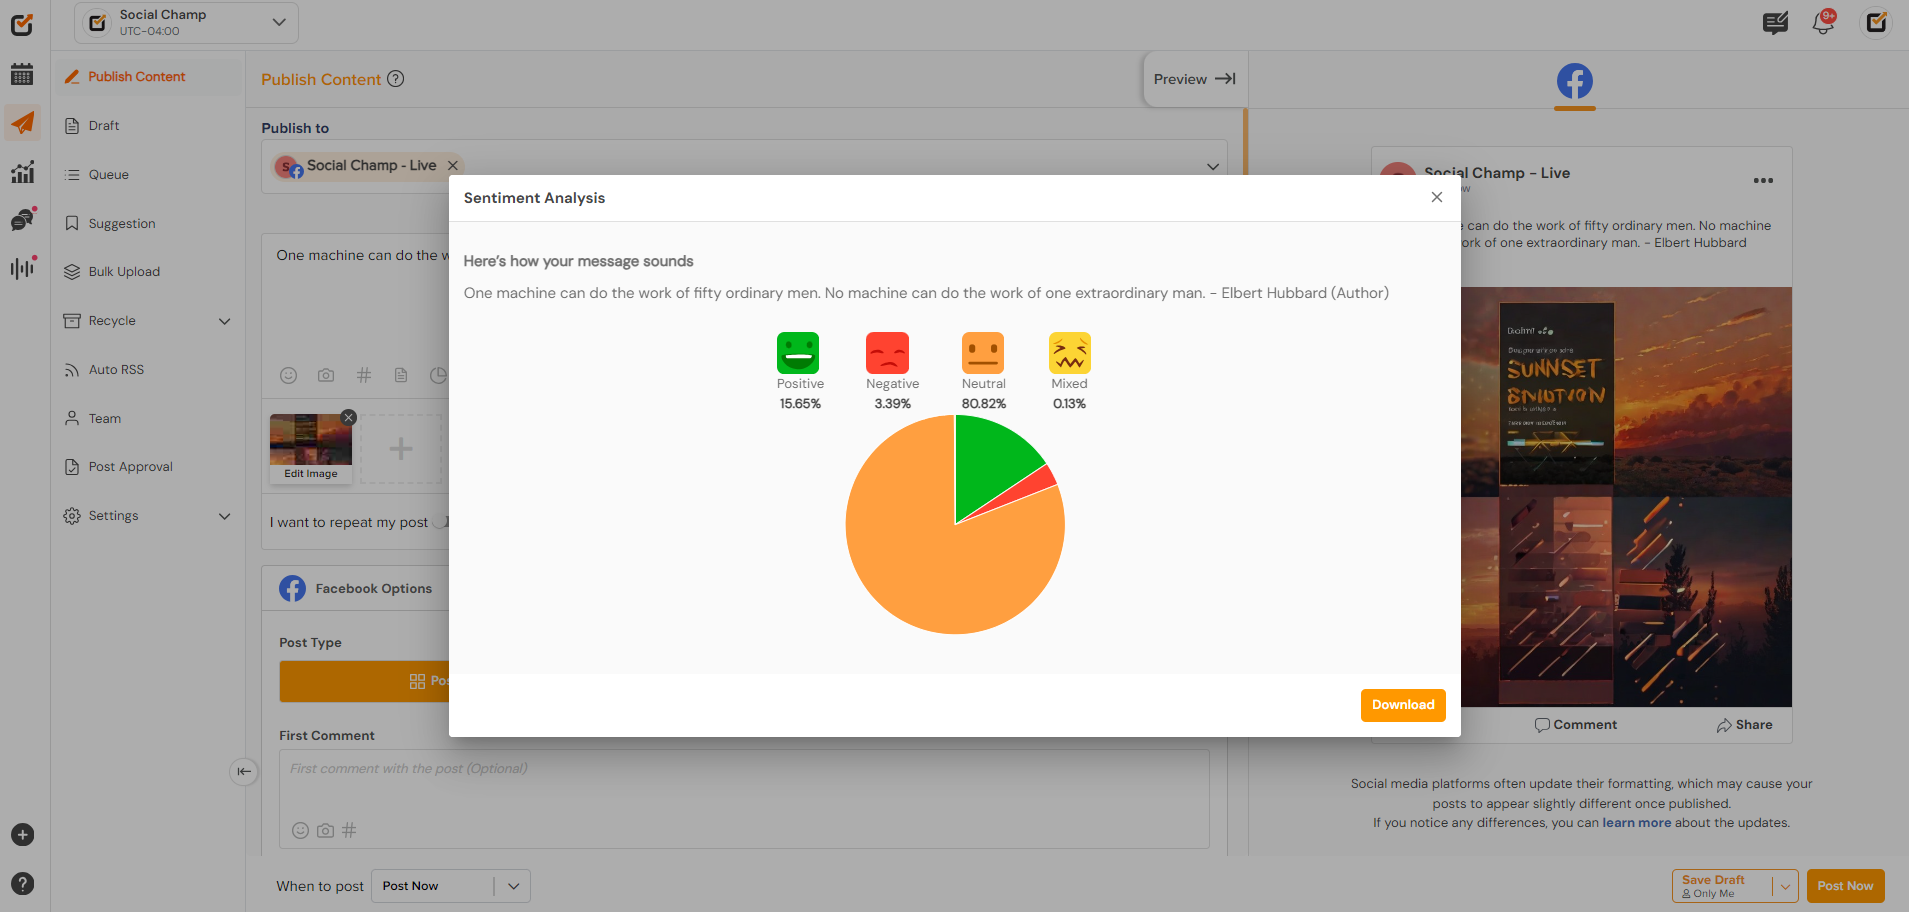
- Review Feedback:
1. Review the sentiment feedback to understand how your audience might perceive your post; you can make changes to the content accordingly.
- Schedule or Publish:
1. Once the tone is right and you are satisfied, schedule or publish your post.
4. AI Suggested Time to Post
Optimize your posting schedule with AI Suggested Time to Post to maximize audience engagement.
Steps to Use AI Suggested Time to Post:
- Login and Navigate to Scheduling:
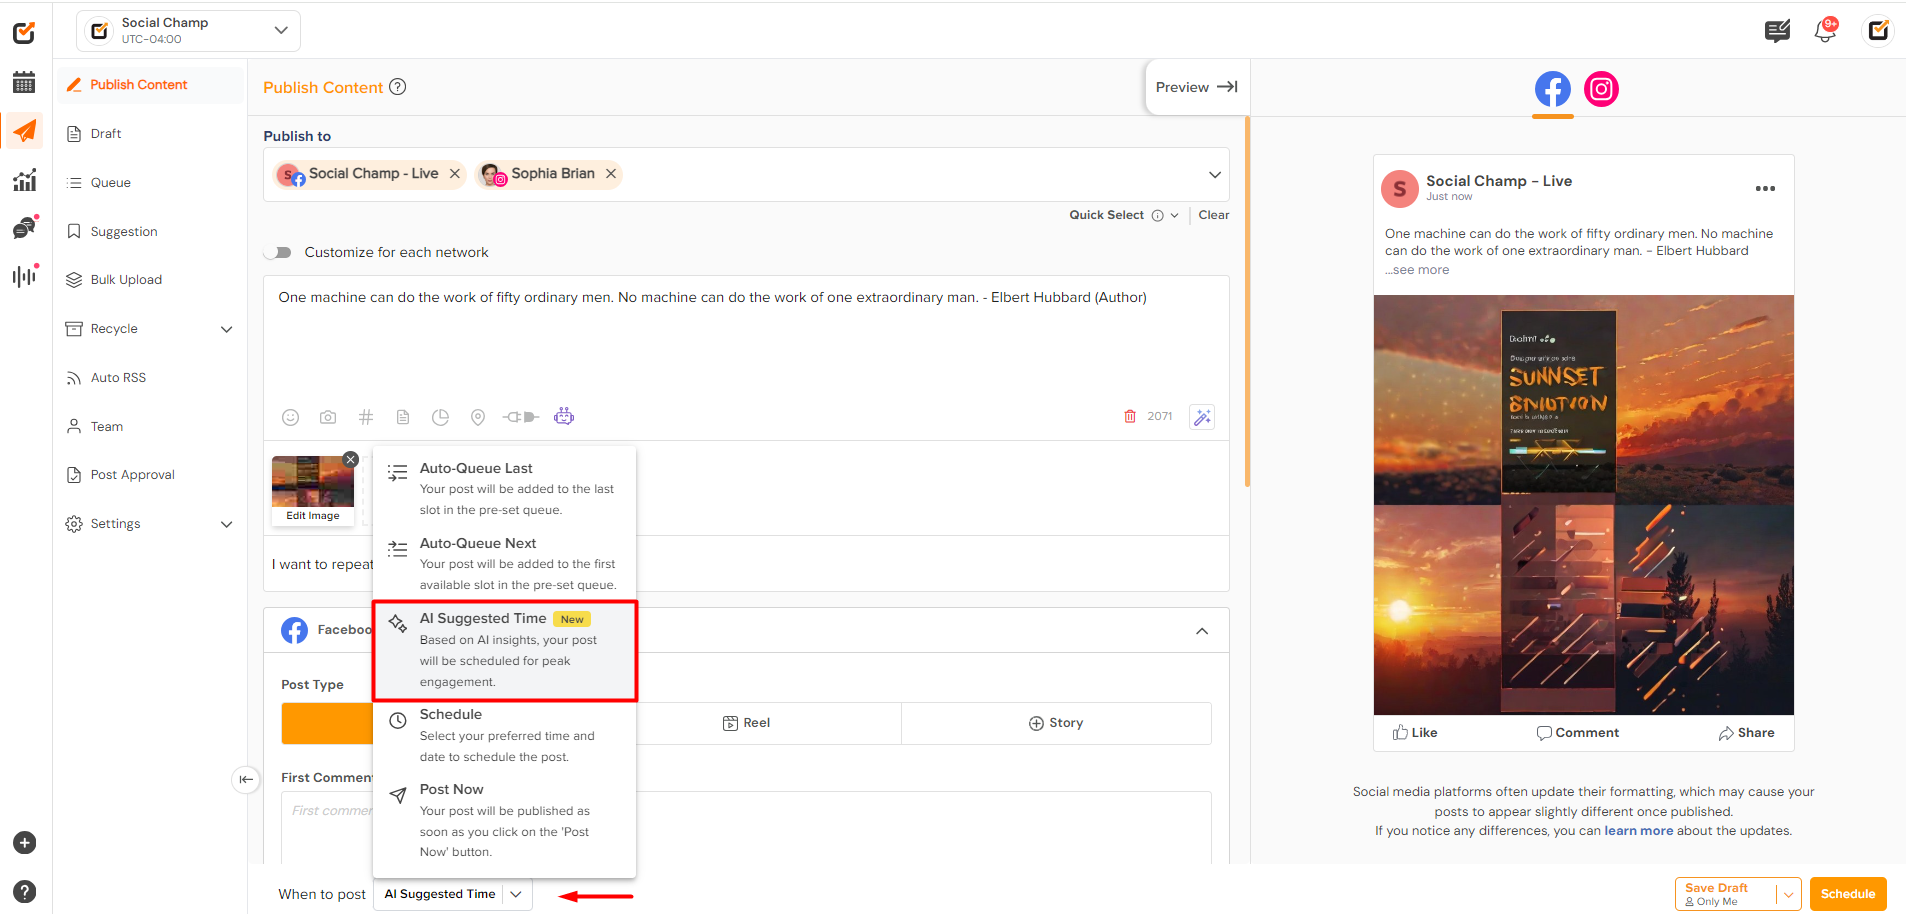
1. Access your Social Champ dashboard, create your post and go to the publishing options. Here find an option for AI-suggested time.
- Select Recommended Time:
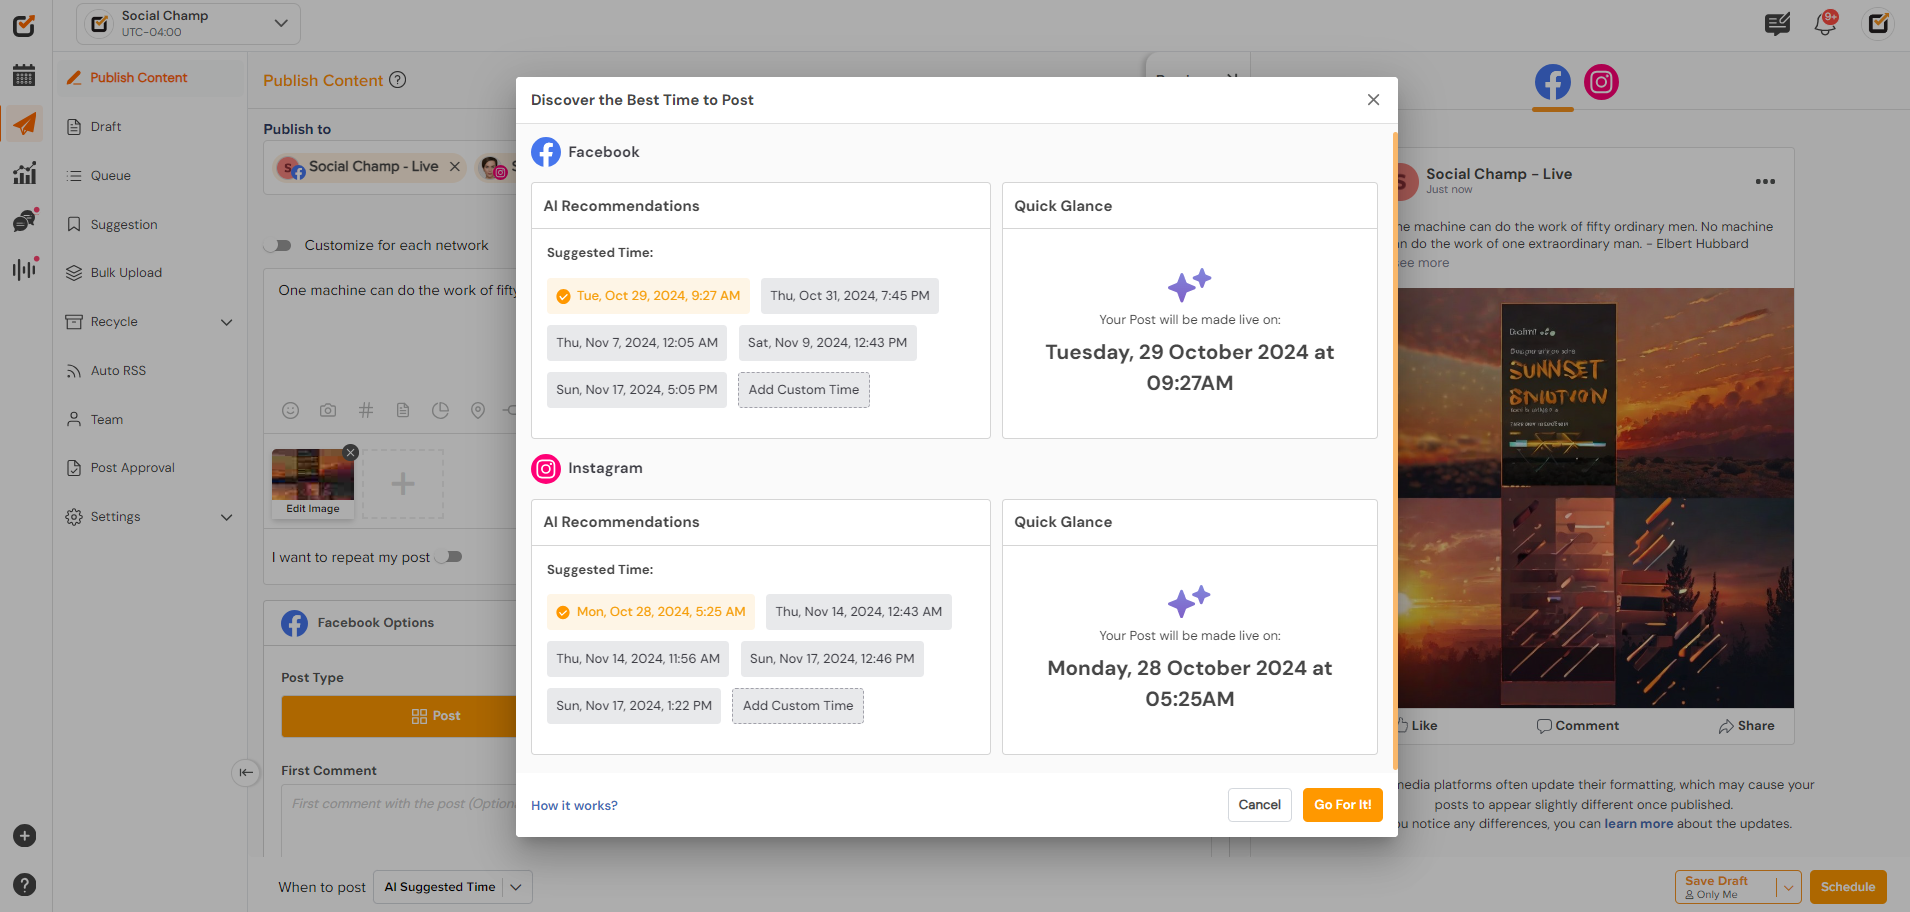
1. The AI will suggest time slots according to the Post content and each social platform. This will help you get the best engagement on your posts.
2. Choose from the suggested time slots that the AI provides for your post. Custom timings can also be selected for each social media account.
- Schedule Your Post:
1. Click “Schedule” to set the post for the recommended time, ensuring it goes live when your audience is most active.
Tips for Best Results:
- Experiment with Different Tones: Try different tones in the AI Content Wizard to see which resonates best with your audience.
- Leverage AI Imaginator for Consistency: Use the AI Imaginator’s customization options to keep visuals consistent across posts.
- Regularly Check Sentiment: Before publishing, use the sentiment analysis tool to maintain a positive brand image.
- Use Suggested Times Consistently: Maximize engagement by scheduling posts at the AI-recommended times.
By following these steps, you can leverage Social Champ’s AI features to enhance your social media strategy effortlessly. Ready to get started? Log in to your Social Champ account today and explore the power of AI Champ!

