Effortlessly schedule your YouTube posts using Social Champ’s powerful Bulk Upload feature! This guide walks you through a streamlined process to upload and manage multiple YouTube posts at once, saving time and making content planning more efficient.
Did you know you can schedule YouTube posts effortlessly using both our Basic CSV template and the advanced Bulk Upload feature? Start by exploring the general Bulk Upload guide here.
This guide focuses on how to use Bulk Upload specifically for YouTube posts. Follow these steps to schedule and manage multiple YouTube posts at once, streamlining your workflow and saving you valuable time.
Step 1: Access the Bulk Upload Feature
- Log in to your Social Champ account and go to the main content dashboard.
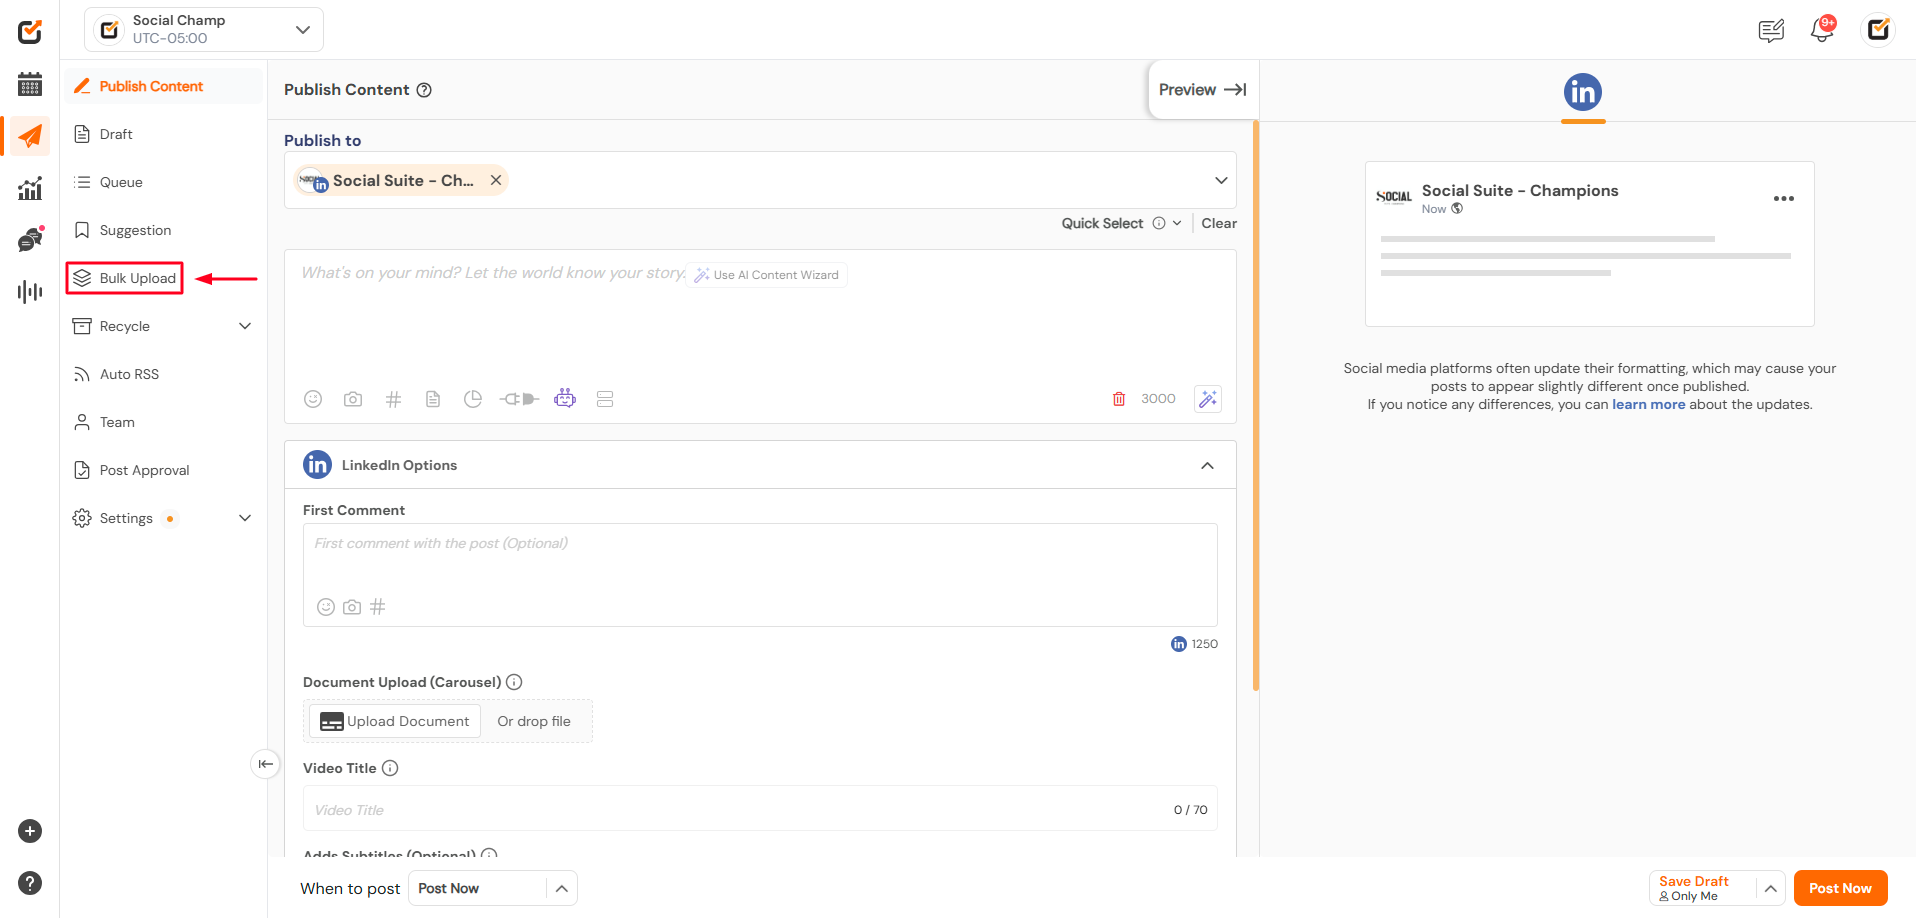
- From the left-hand panel, select the Bulk Upload option.
Step 2: Prepare Your CSV File
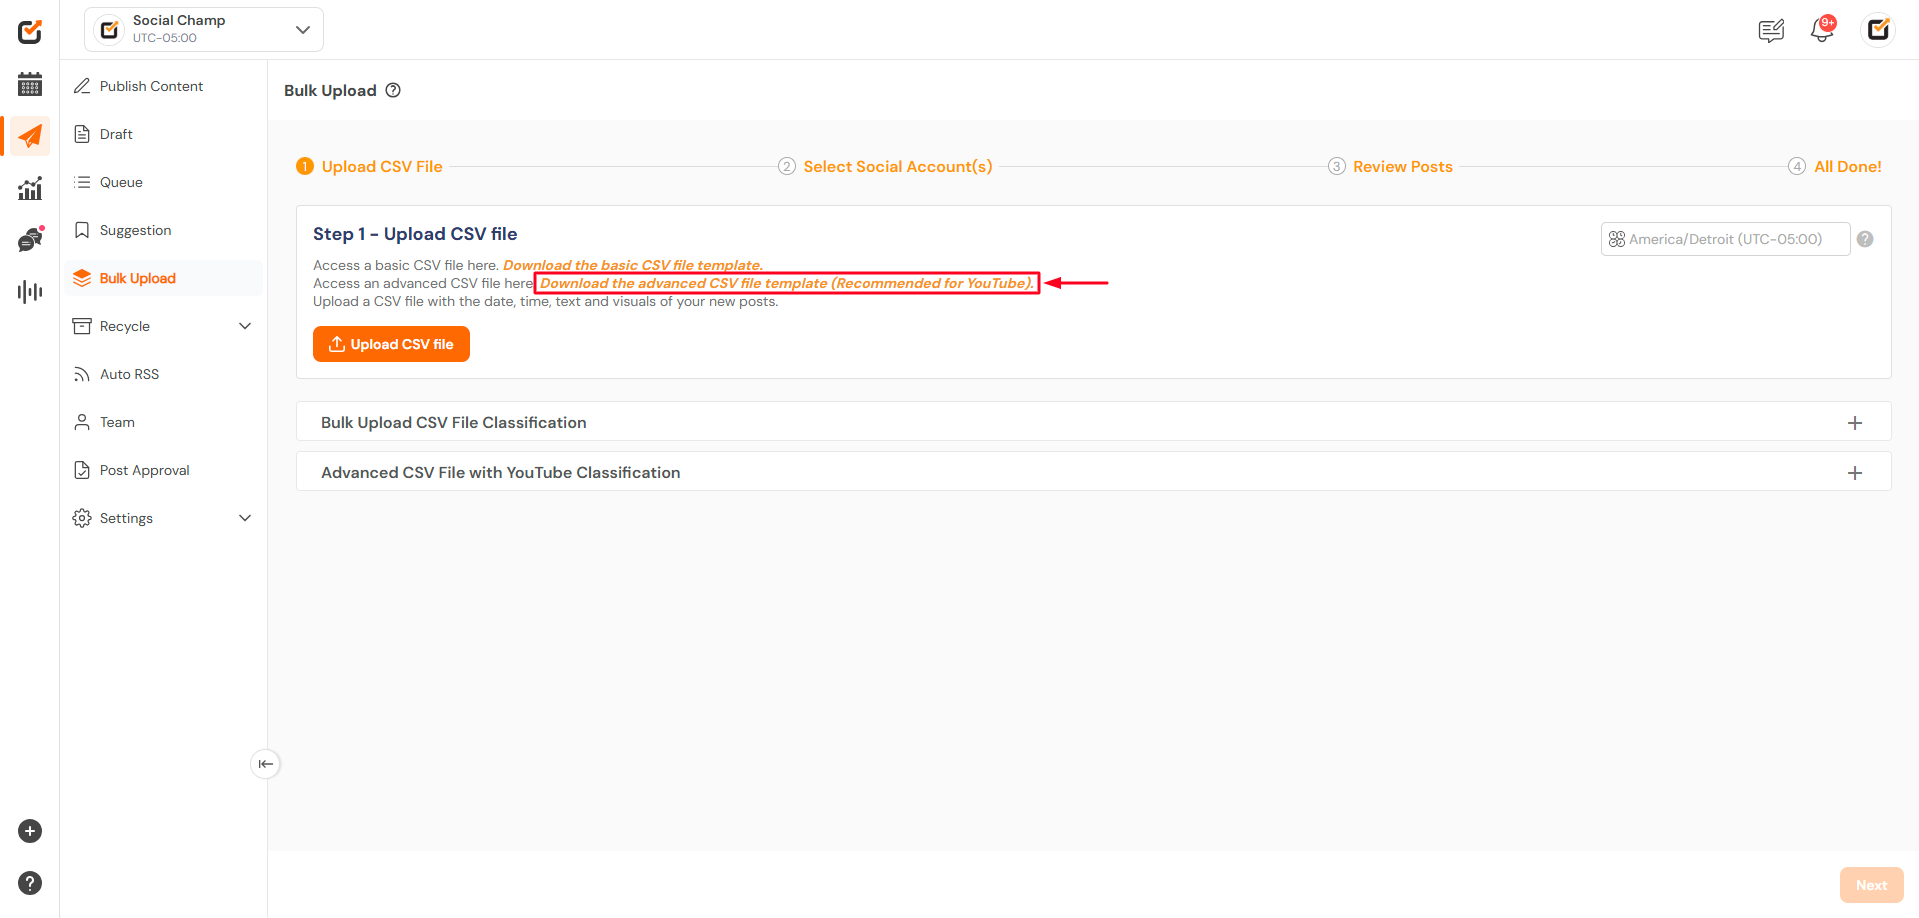
- Click the Download CSV File Template button to get the pre-formatted file designed for YouTube posts.3
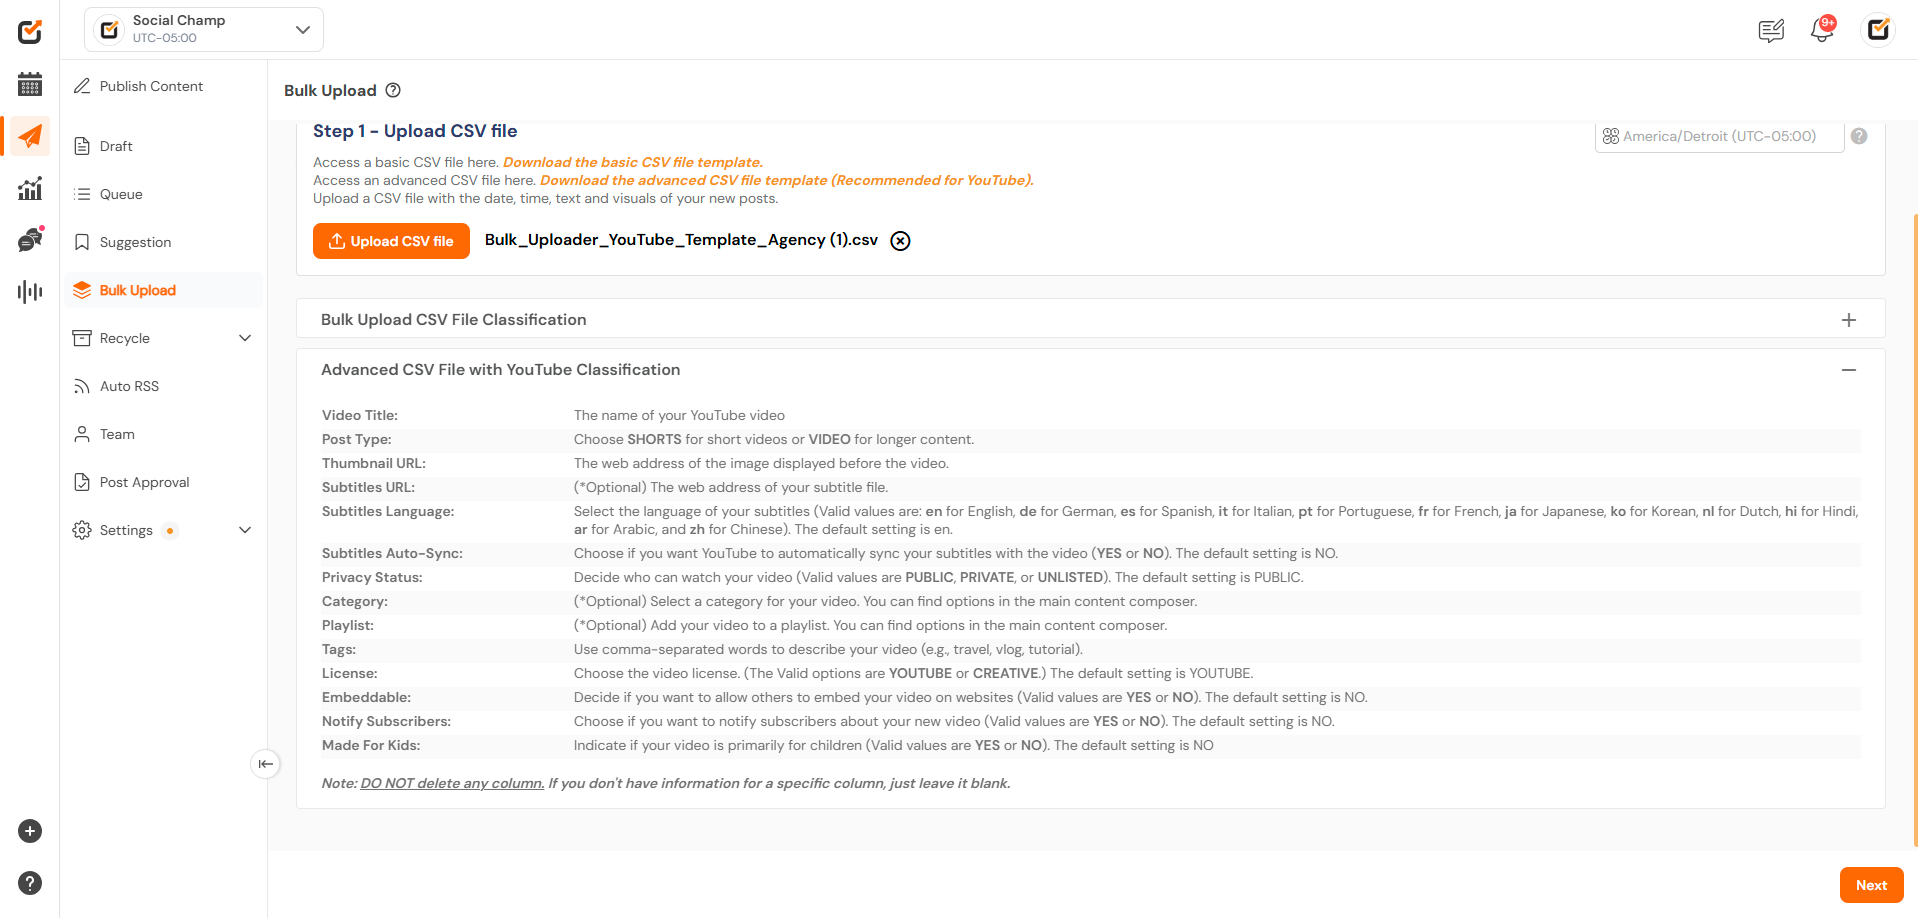
- Fill in the template with your post details, ensuring the following:
- Video URL: Add the full URL of the video you want to upload.
- Post Description: Write the content you want to accompany the video.
- Title: Include a title for the video (if applicable).
- Publish Date and Time: Ensure proper date formatting as per the instructions provided in the Bulk Upload section.
Make sure you follow the instructions listed on the Bulk Upload screen to avoid formatting issues. 2 and 2.5
Step 3: Upload Your CSV File
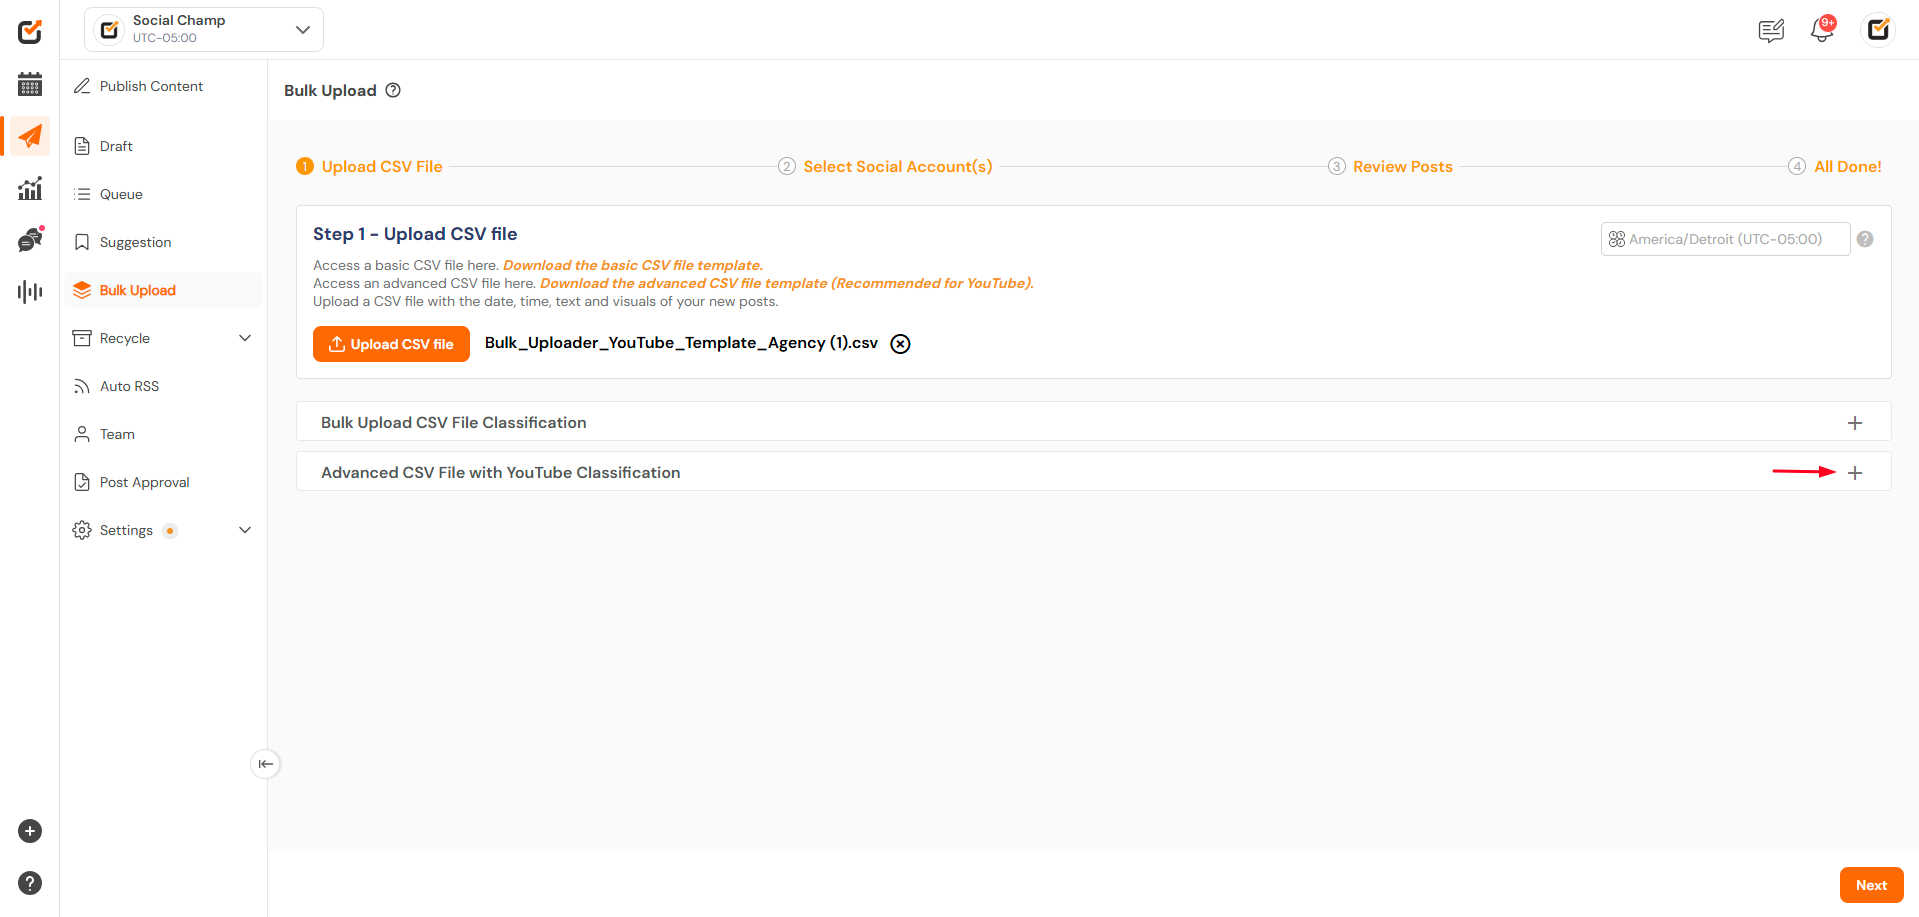
- Once your CSV file is ready, click on Upload CSV File and select it from your device.
- Choose your YouTube account(s) where the posts should be scheduled.

Step 4: Review and Fix Errors
- Social Champ will process the uploaded file and flag any rows with errors. These will be clearly highlighted for your review.
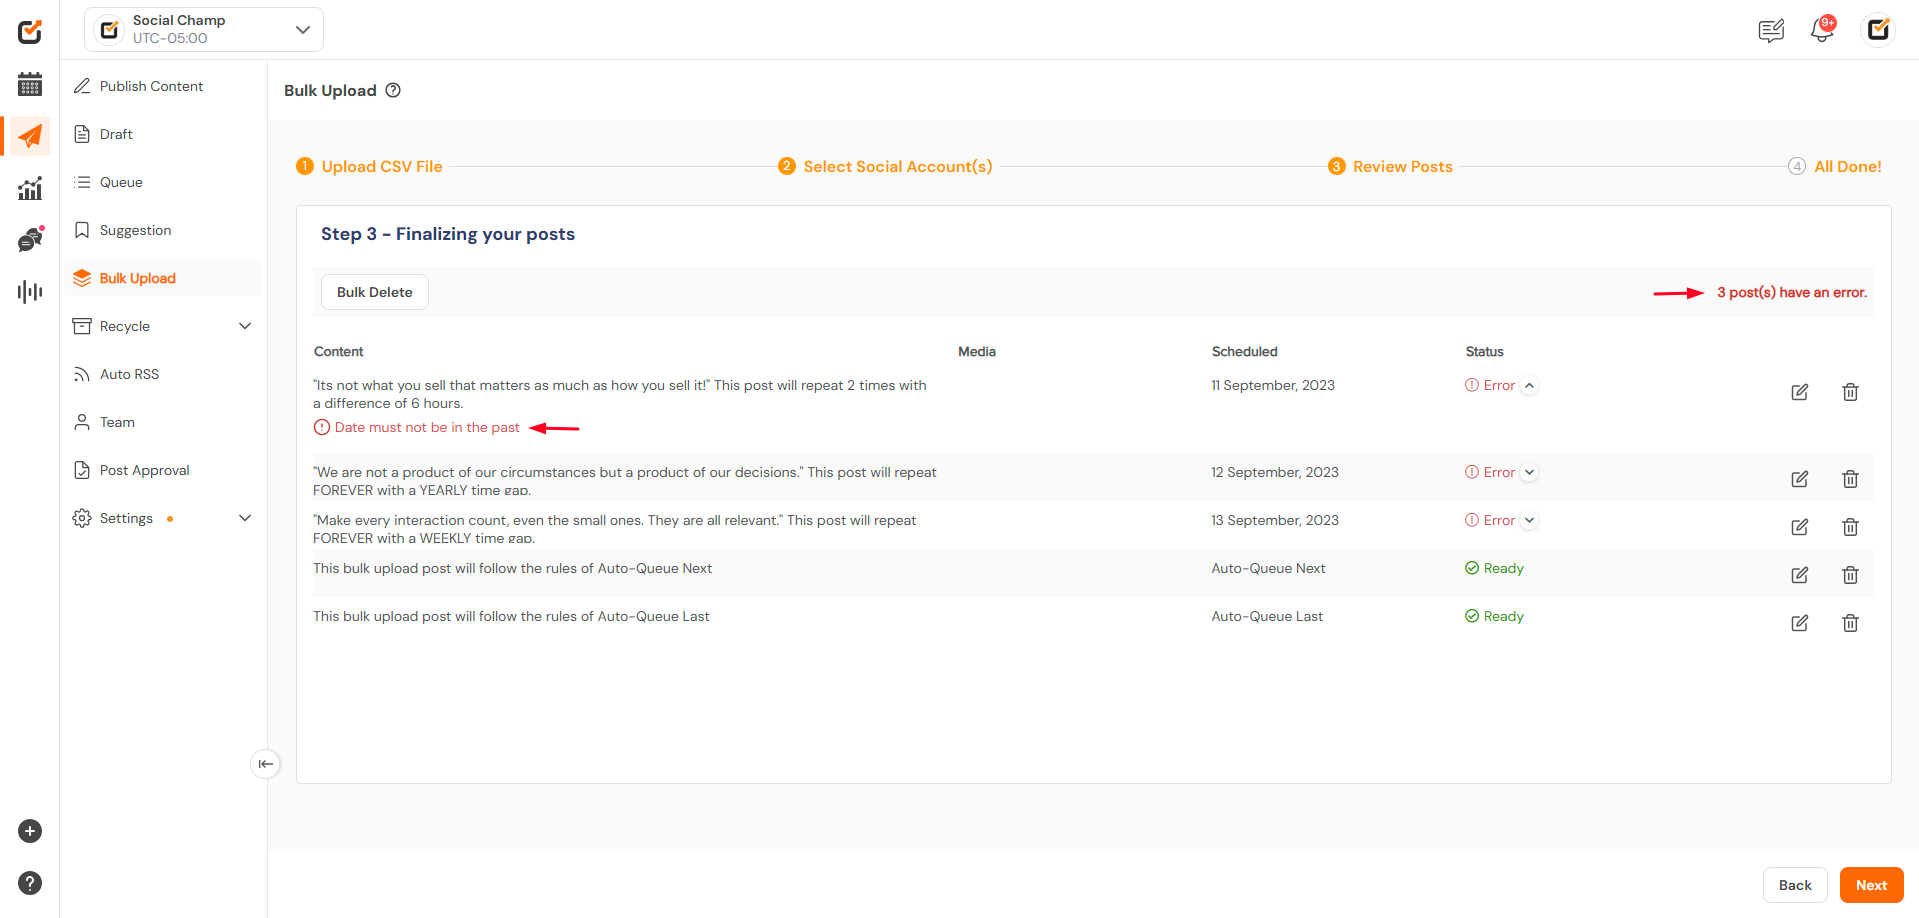
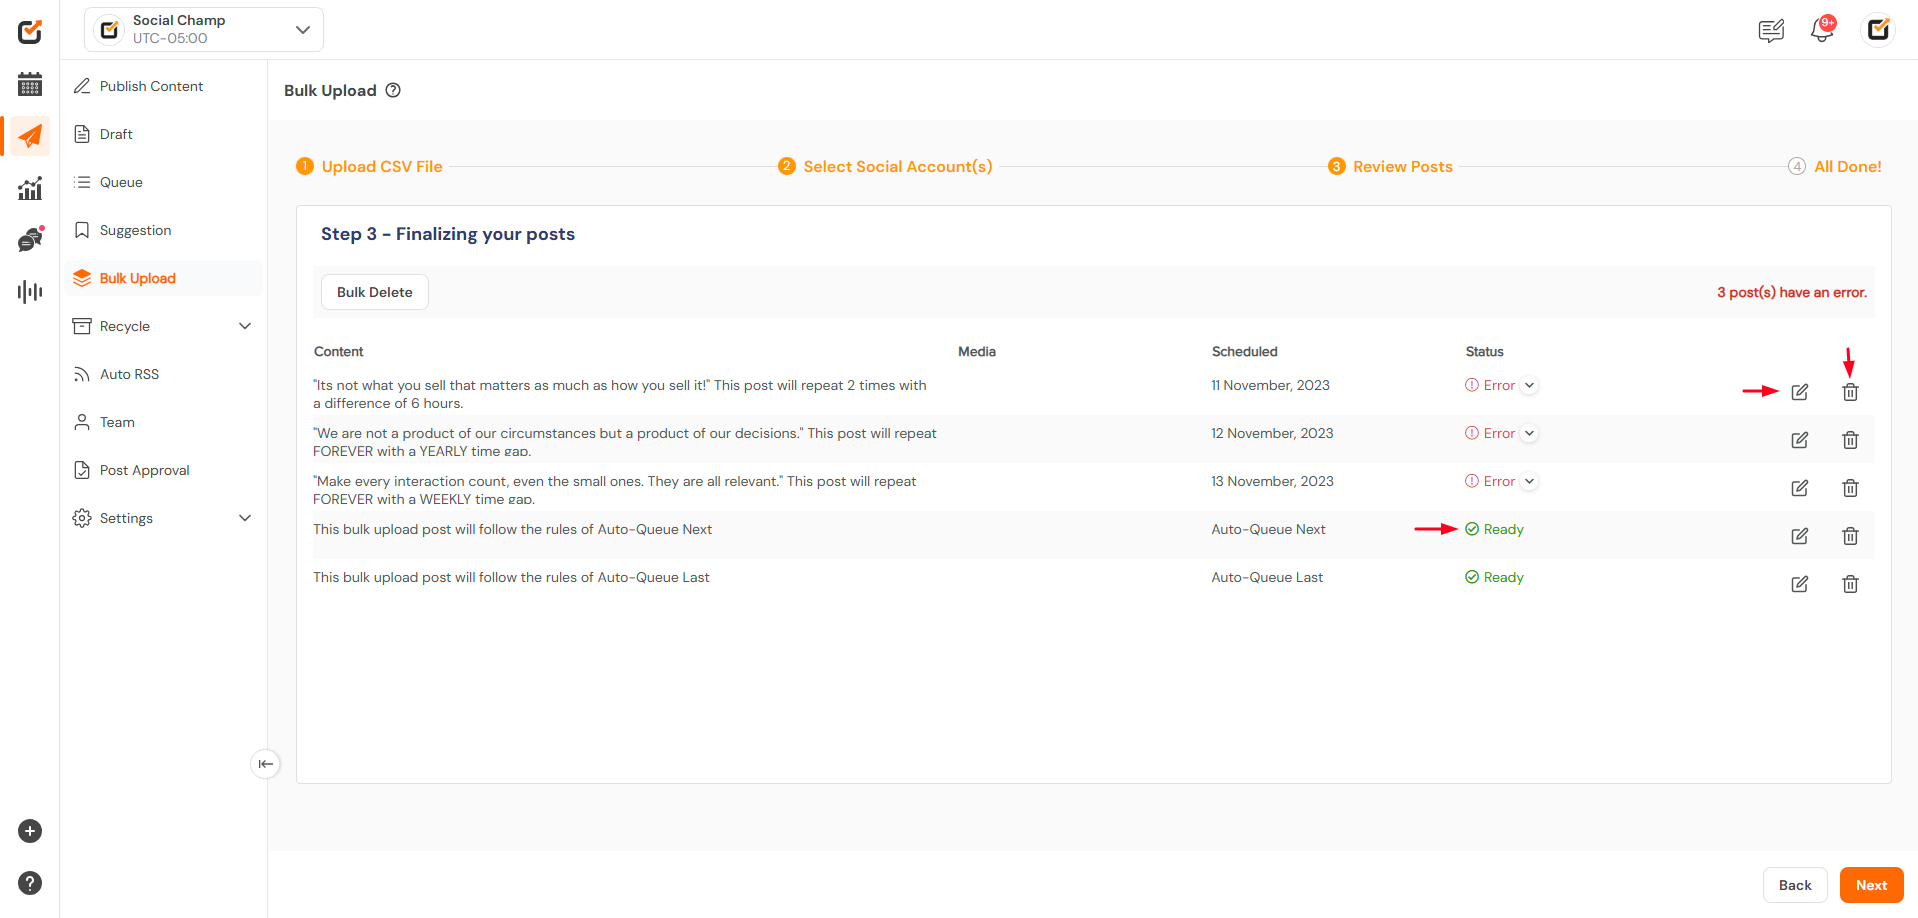
- You can:
- Edit errors directly in the Bulk Upload interface.
- Delete rows that don’t meet the requirements.
Step 5: Handle Formatting Issues
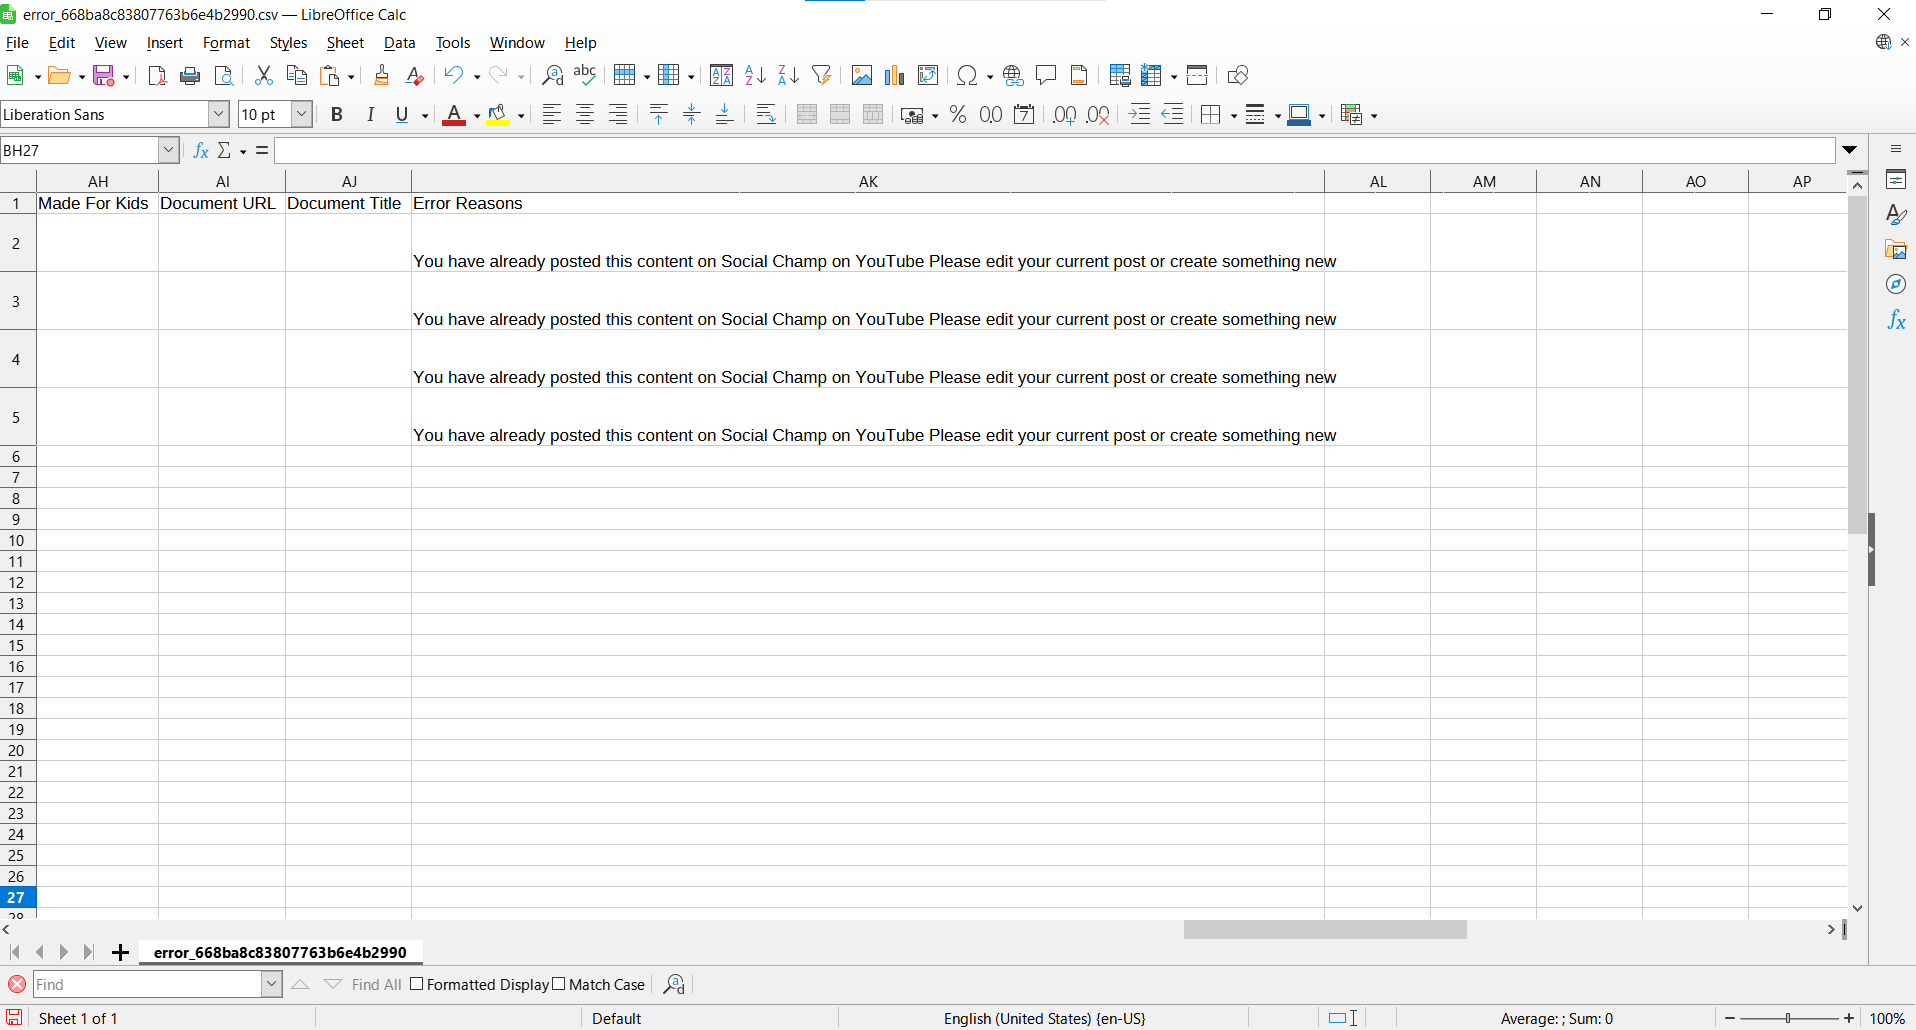
- If the system detects formatting problems, you’ll be prompted to download a CSV file containing the error details.
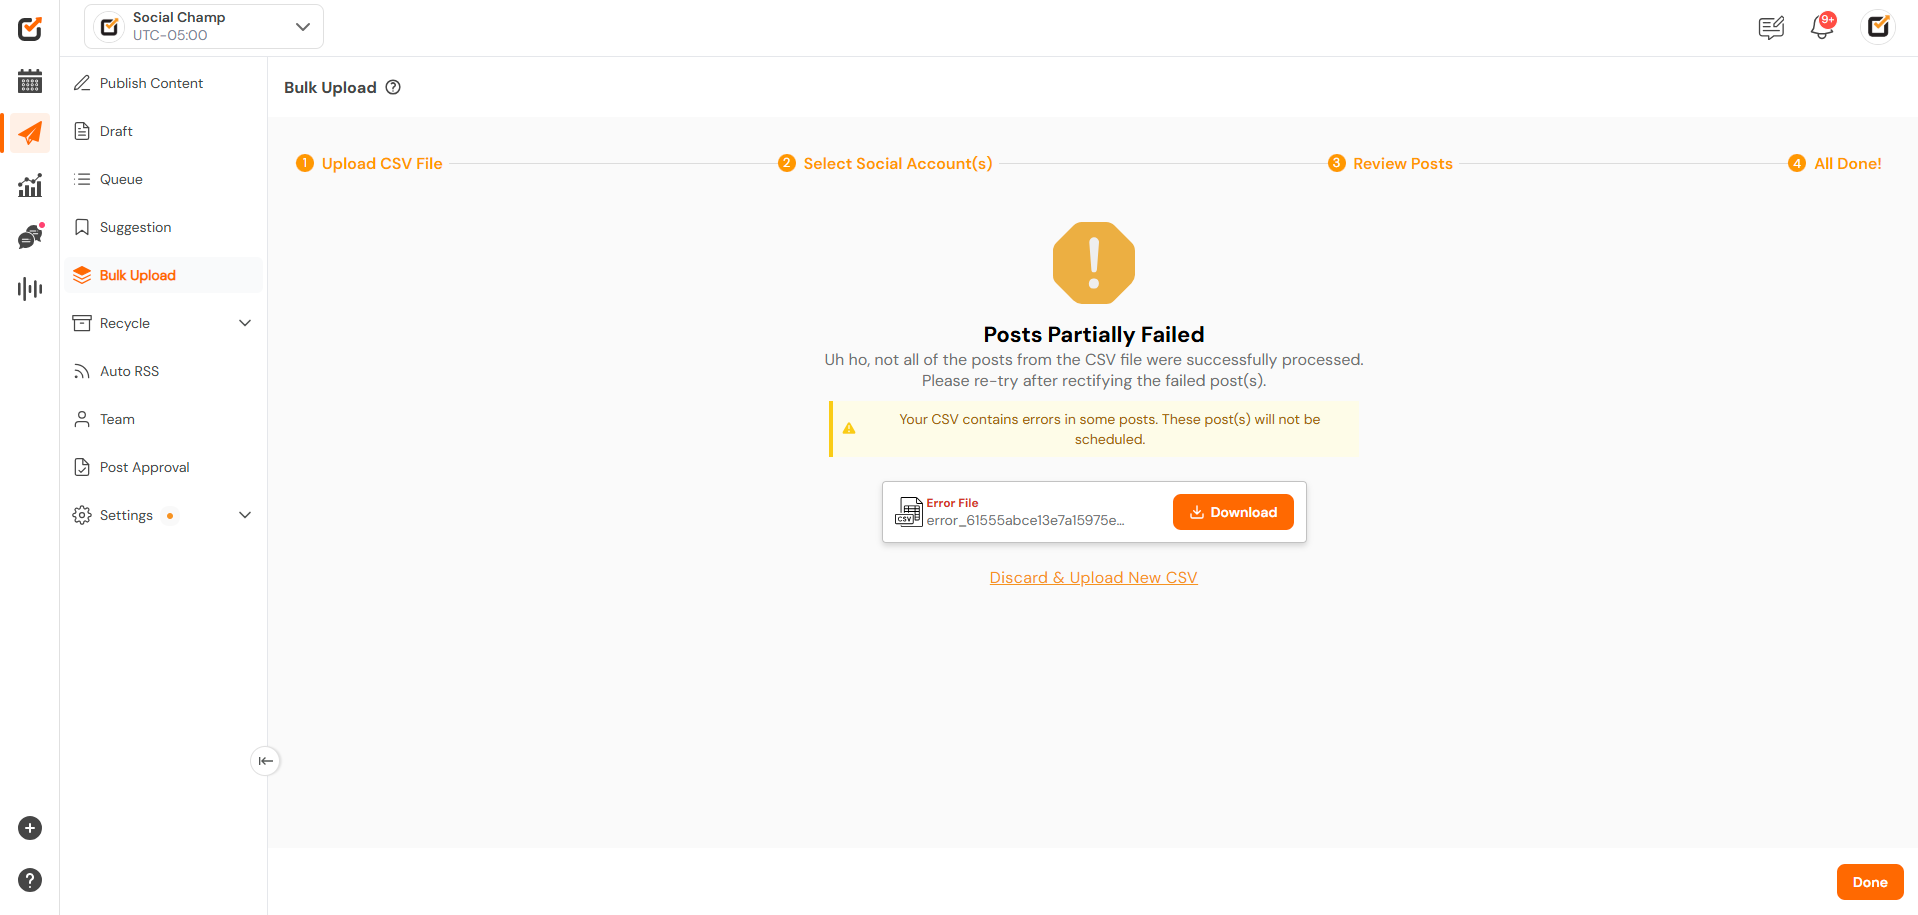
- Make the necessary corrections in the file and reupload it for further processing.
Step 6: Confirm and Schedule
- After resolving all errors, you’ll see a confirmation message indicating that your posts are ready.
- The scheduled YouTube posts will appear in the Queue or Calendar, where you can review them before they go live.
Final Tips
- Video Restrictions: Ensure the videos meet YouTube’s size, length, and format requirements before adding them to the CSV file.
- Post Optimization: Include relevant keywords and hashtags in your descriptions to enhance video reach.
That’s it! Bulk Upload makes it easy to schedule your YouTube content in just a few steps. 🚀
If you run into any issues or have questions, don’t hesitate to contact us—we’re here to help!
