Hey Champs! After scheduling the content, you can edit your scheduled post from the Calendar/Queue.
Let’s get started with the step-by-step guide to learn how to edit the scheduled post from the Calendar.
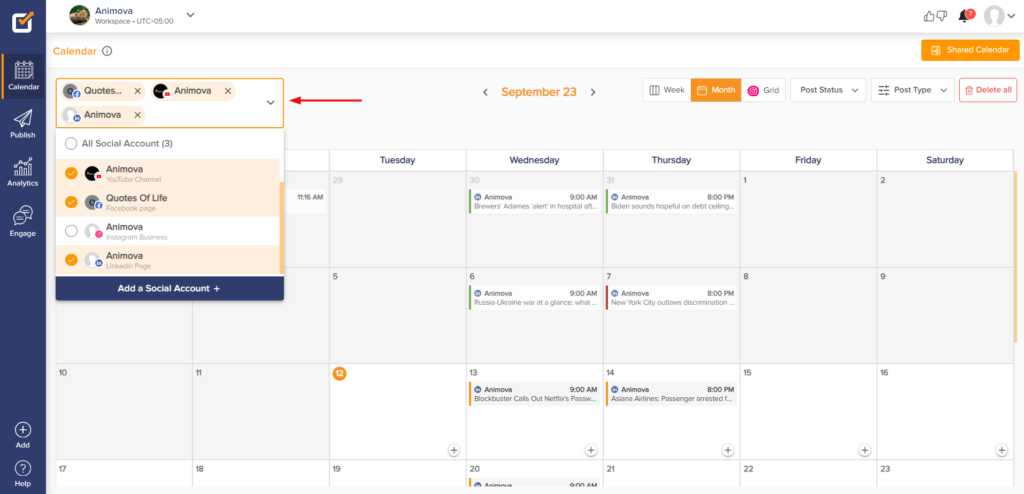
Select ‘Calendar’ from the left blue pane.
- Choose your social media accounts from the top left drop-down for which you want to see the scheduled post.
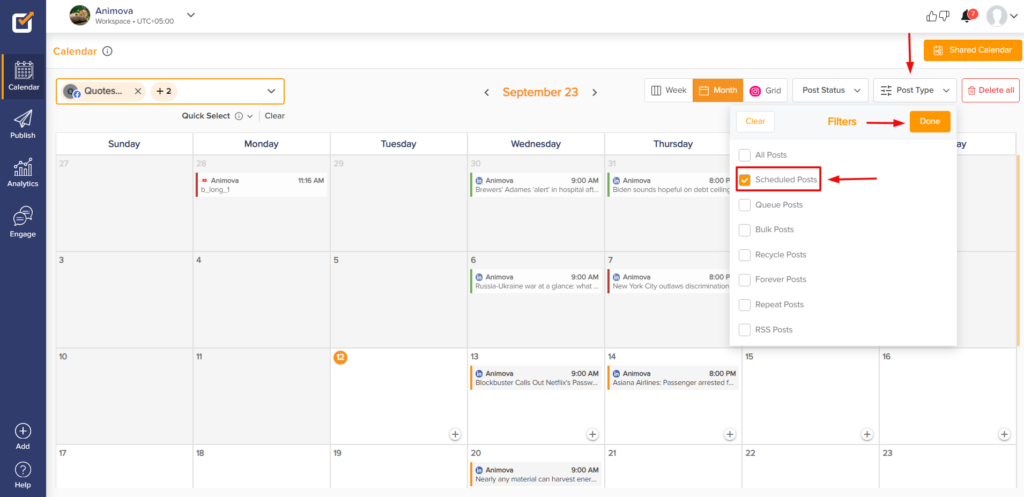
- From the top right drop-down, you can filter the posts based on the post type available. Select ‘Scheduled Posts’ to see the posts accordingly.
- Clicking on the post will enable you to have the post preview on the right side of the Calendar. To edit the post, click on the Edit/Reschedule button available at the bottom of the Preview.
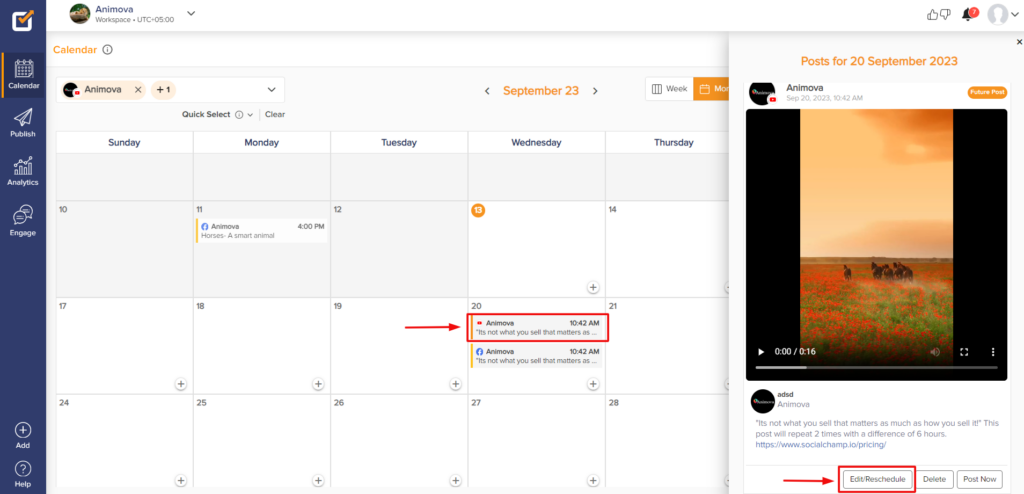
- A pop-up window will appear; make the desired edits and click ‘Save.’

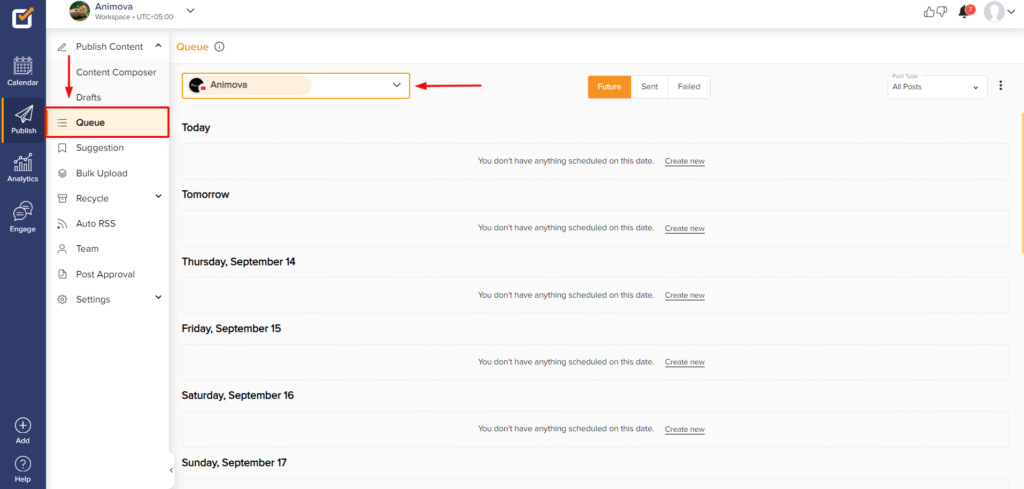
You can also edit the scheduled post from the Queue section. Let’s see how it works.
- Select ‘Publish’ from the left blue pane.

- Choose ‘Queue’ from the left column and select the social media account from the top left drop-down.
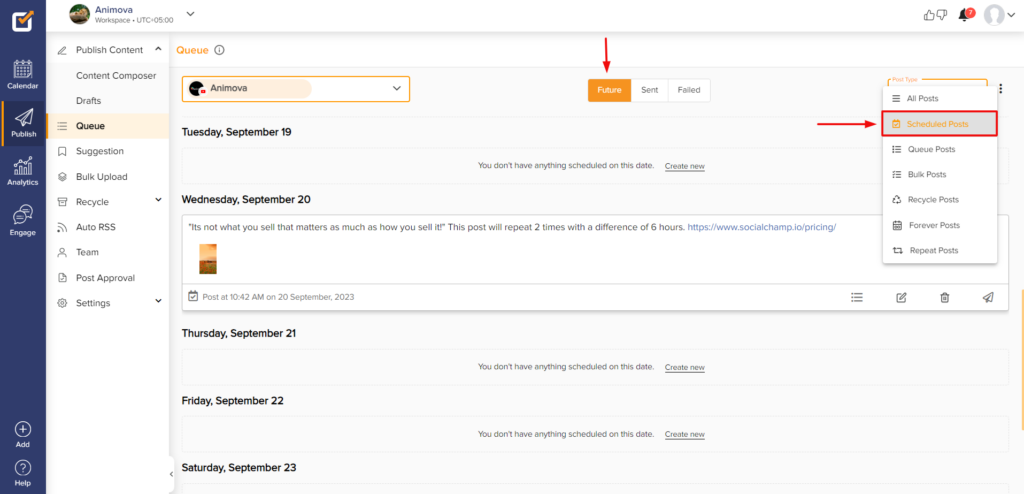
- Being on the ‘Future’ tab, select the post type as ‘Scheduled Posts.’ Here, you can see all of your scheduled posts for the selected social media account.
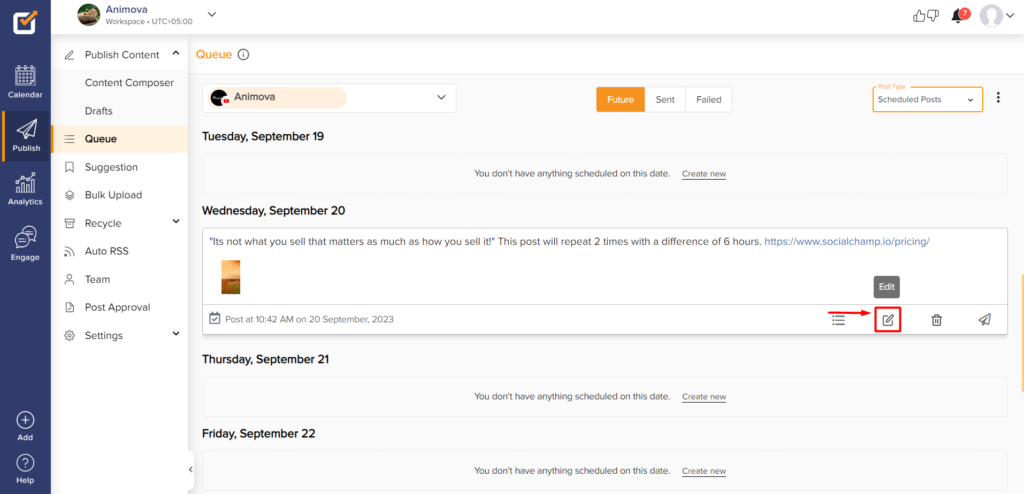
- Select the ‘Edit’ button available at the bottom of the scheduled post.
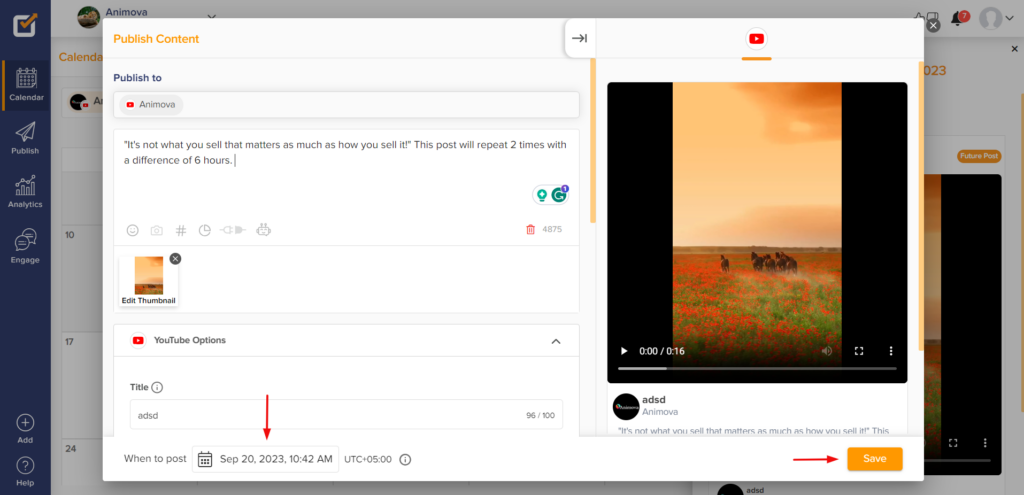
- A pop-up window will appear, make the desired edits and click ‘Save’.
Great work! Now you know how to edit your scheduled posts in the Calendar and Queue.
More of a visual learner? Check out this video about the Queue Feature and our Social Media Calendar.
Hey Champs! Social Champ’s Calendar feature allows you to get a bird’s eye view of all your social media scheduling Read more
Hey, Champs! Social Champ now introduces its much-awaited feature ‘Shared Calendar’, which allows you to share your scheduled posts in Read more
Hey Champs! After scheduling the content, the scheduled posts can be viewed in Calendar/Queue. Let’s get started with how to Read more
Hey, Champs, have you ever wondered how to delete scheduled posts? Social Champ allows you to delete them from the Read more