The post-approval feature serves as an exclusive system designed to help the owner/admin of the account to control the flow of content on different social media platforms.
The feature enables content approval at two distinct levels, which are as follows,
- Post-approval at the Workspace level
- Post-approval at the Team member level
Post Approval at Workspace Level
The workspace level post-approval ensures all scheduled posts created for a social account in your workspace land in post approvals first (even if the admin or the owner creates a post).
Let’s get started with how post-approval at the Workspace level works.
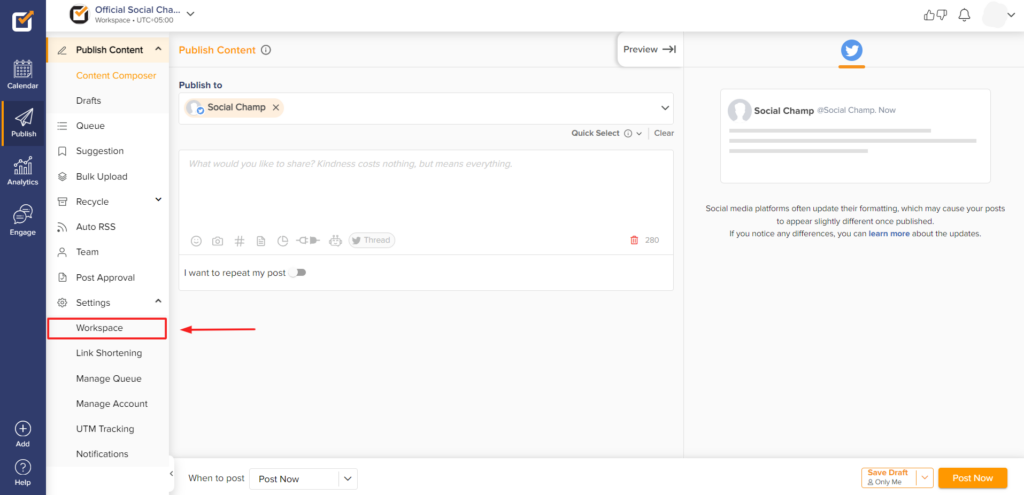
- Log into your Social Champ account, and you will land on the main content dashboard. Click on the ‘Workspace’ option from the left panel under the Settings option.
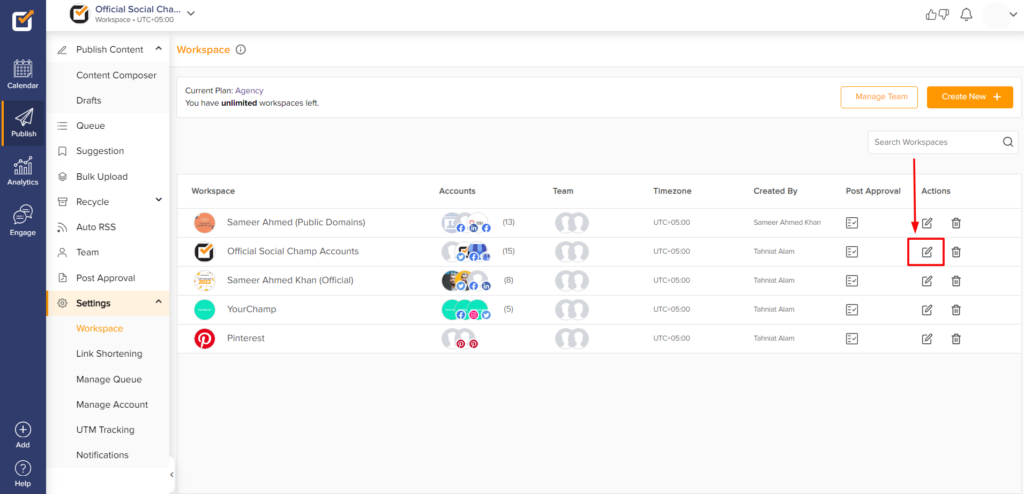
- You will land in Workspace Management, where you can see all your workspaces listed. Click the pen icon for the workspace you want to activate post approvals for.
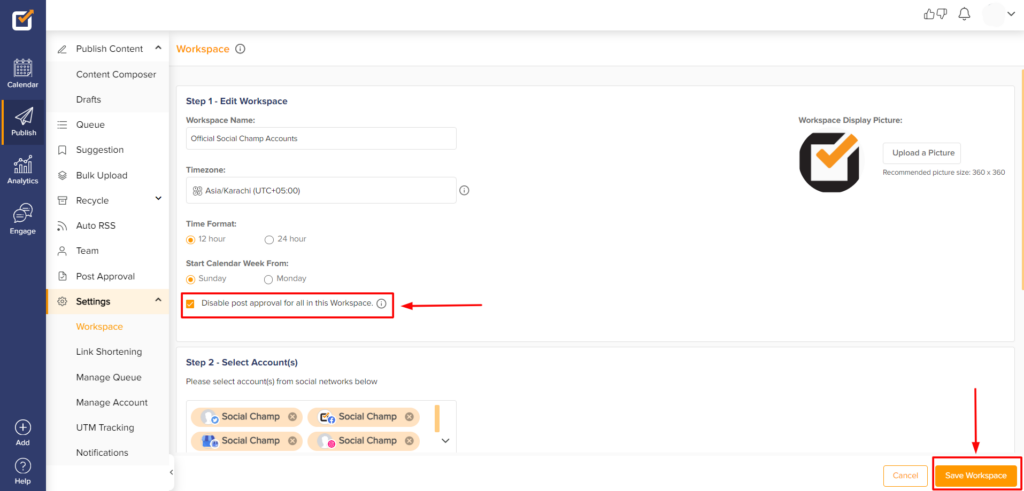
- Here, tick the checkbox that says “Enable post approval for all in this Workspace.” then hit Save Workspace.
Post-approval at the Team member level
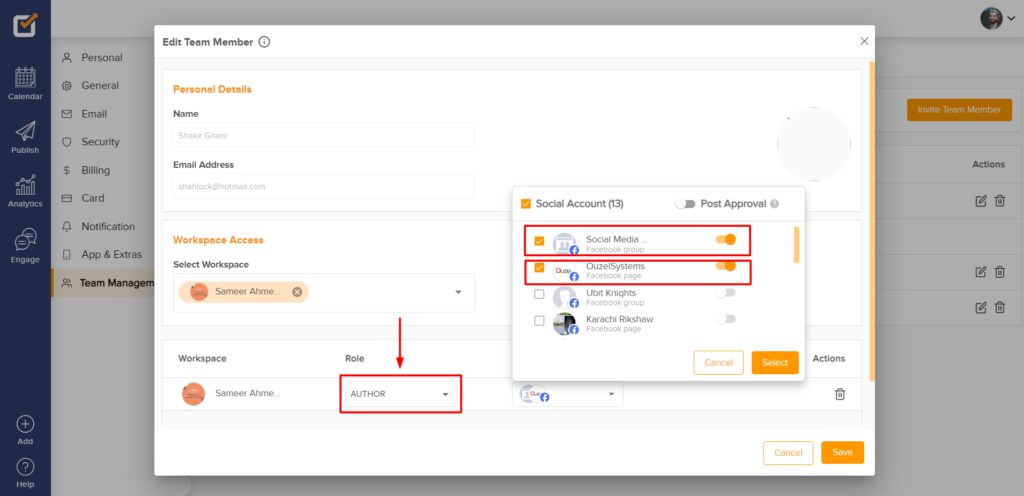
Post approval can also be managed at the individual team member level, allowing the admin/owner to approve content specifically created by the Author (team member).
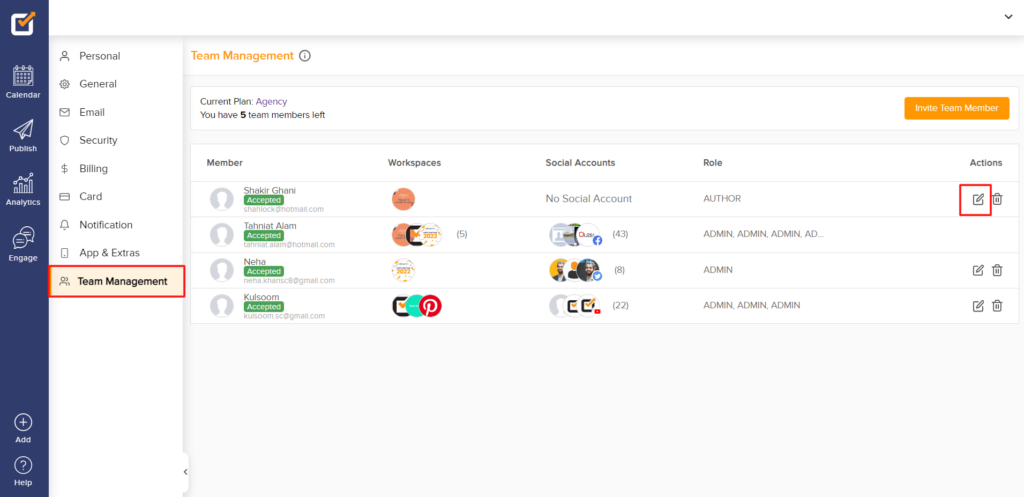
The admin/owner of the account can control the post-approval for the Author by clicking on team management. Moreover, the admin/owner can select the accounts for which they want to switch on the post-approval. This will enable all the scheduled posts by the Author for the specific account to fall for approval before scheduling.
Let’s get started with how the post-approval at the team member level works.
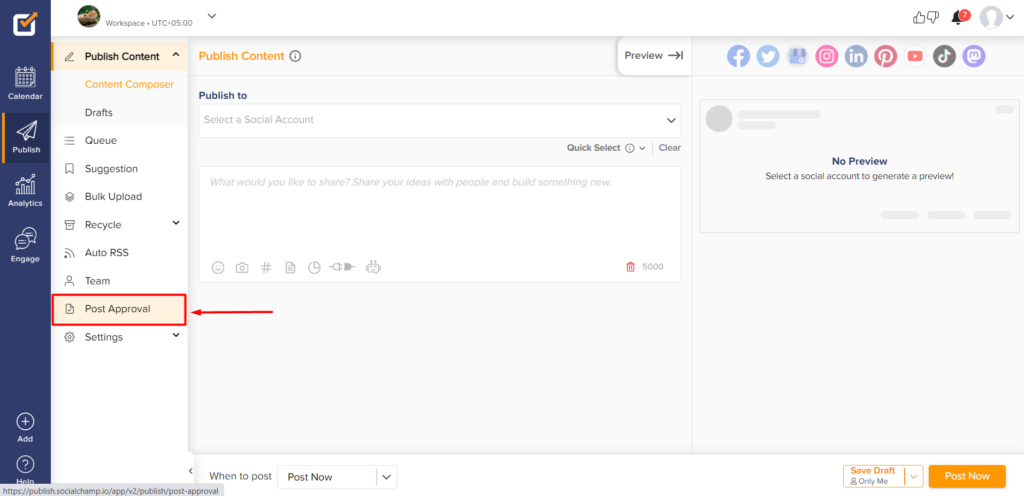
- Log in to the platform, and you will be directed to our main content dashboard. Select the Post-Approval feature from the left panel.
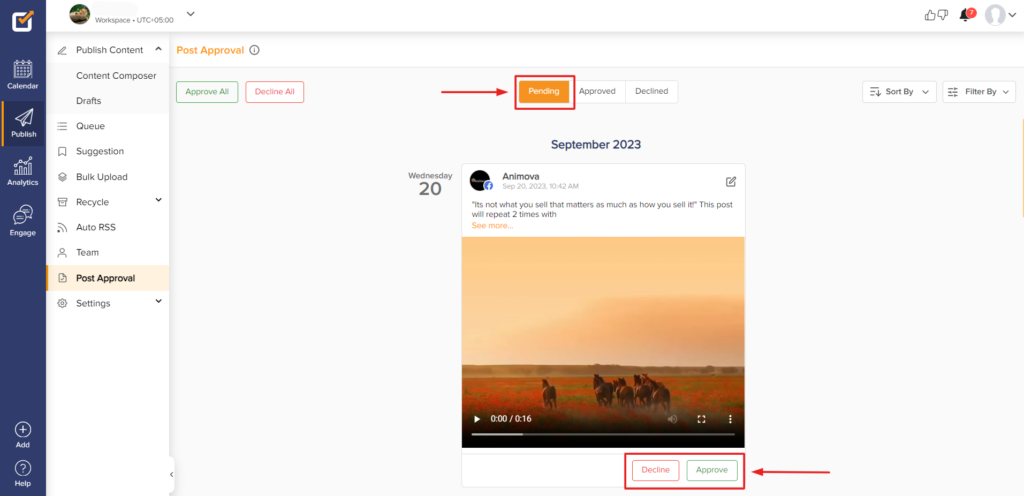
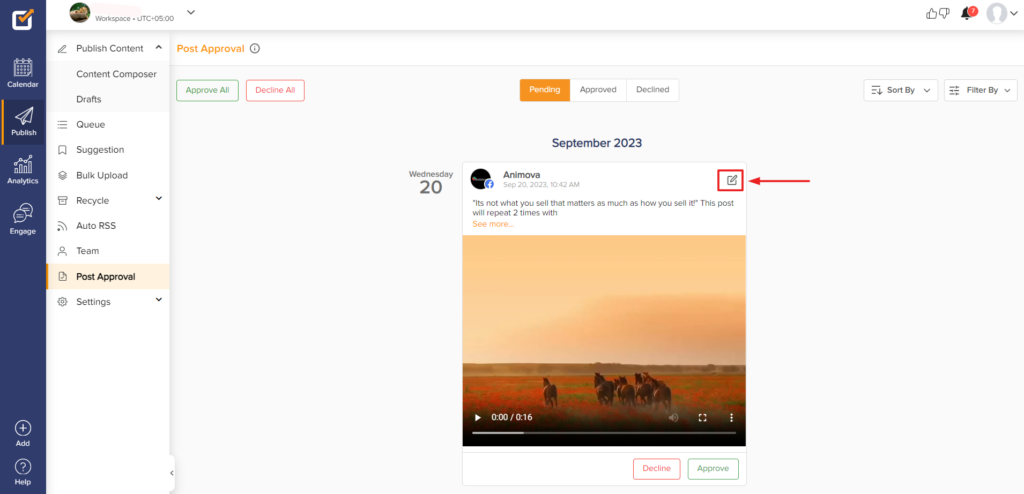
- You can find all the posts submitted for approval in the Pending section.
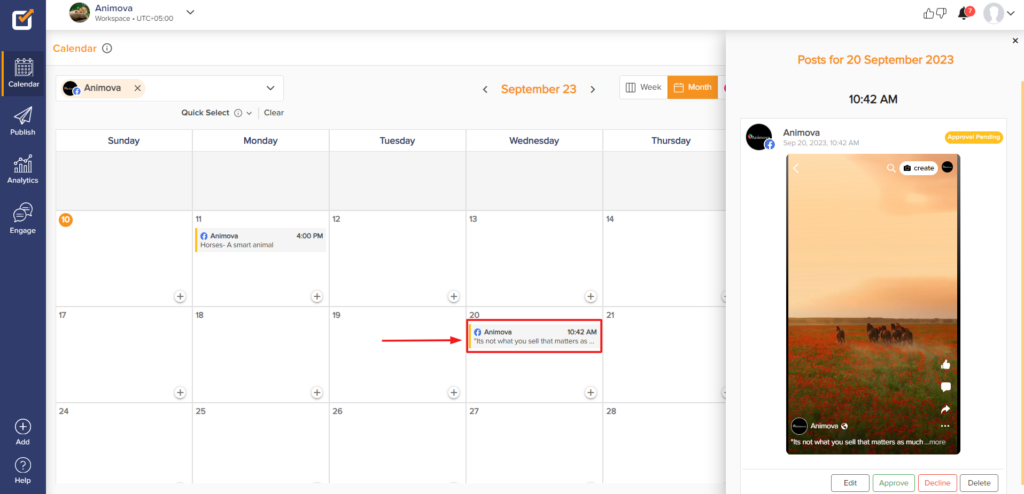
Now, the account owner/admin has the authority to approve or decline the posts that have been submitted for approval.
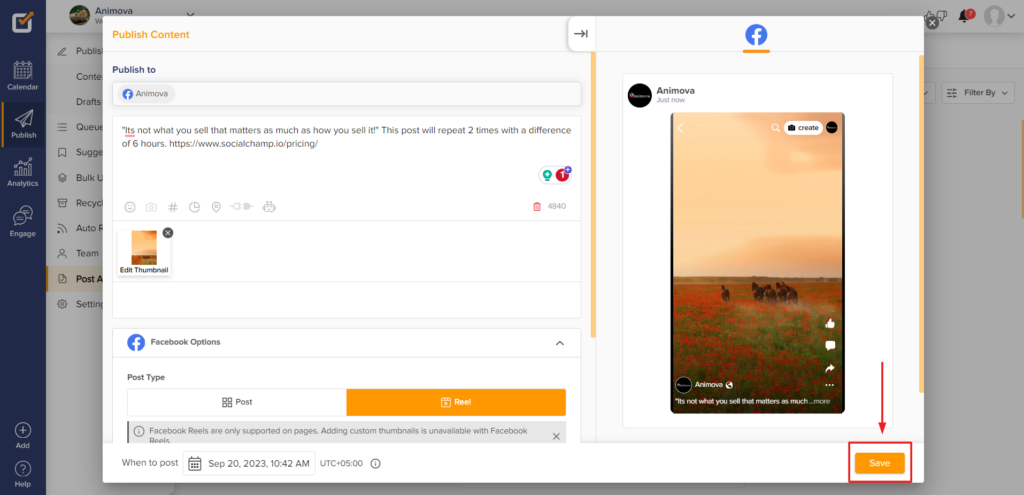
- You have the option to edit the posts that are in the pending stage. By clicking on the pen icon at the top right of the pending post, you can modify or update the content before giving it your final approval.
A pop-up composer will show up. After making the changes, you can hit save. (Please note: This does not approve the post but makes edits to the post).
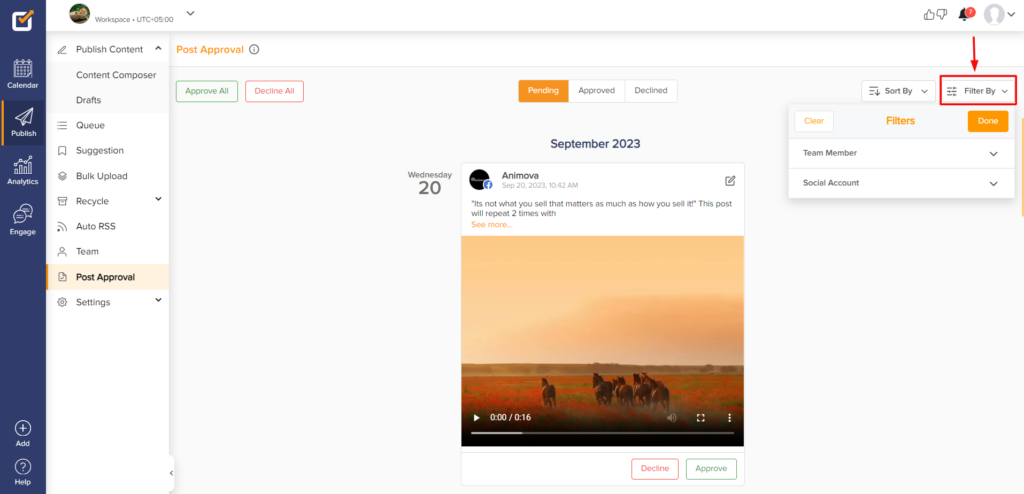
- You can filter the posts by clicking the Filter By button at the top-right to select Social Accounts or Team Members.
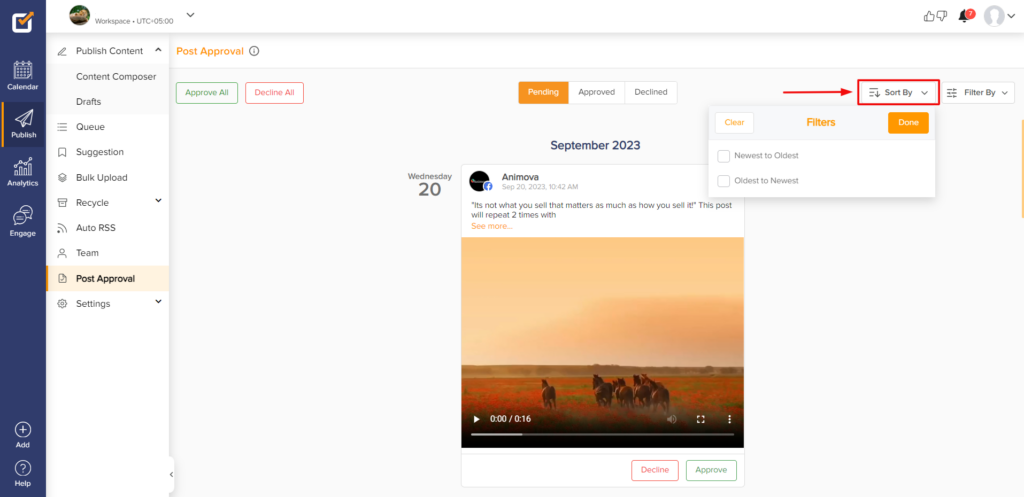
- You have the option to sort your posts in the Post Approval tab. By clicking the “Sort By” button at the top-right corner, you can choose between sorting the posts from Newest to Oldest or Oldest to Newest.
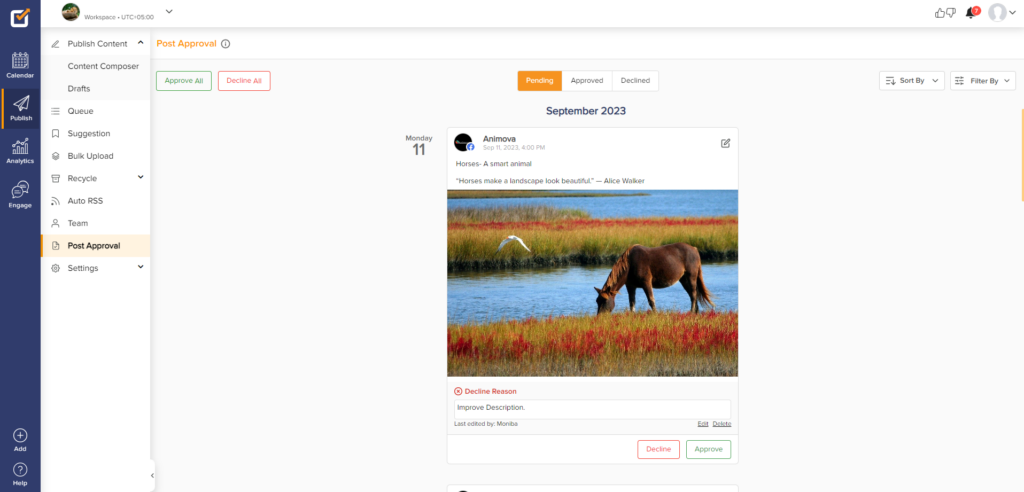
- If you decline a post, you can leave a comment for the team member to view and make the necessary edits.
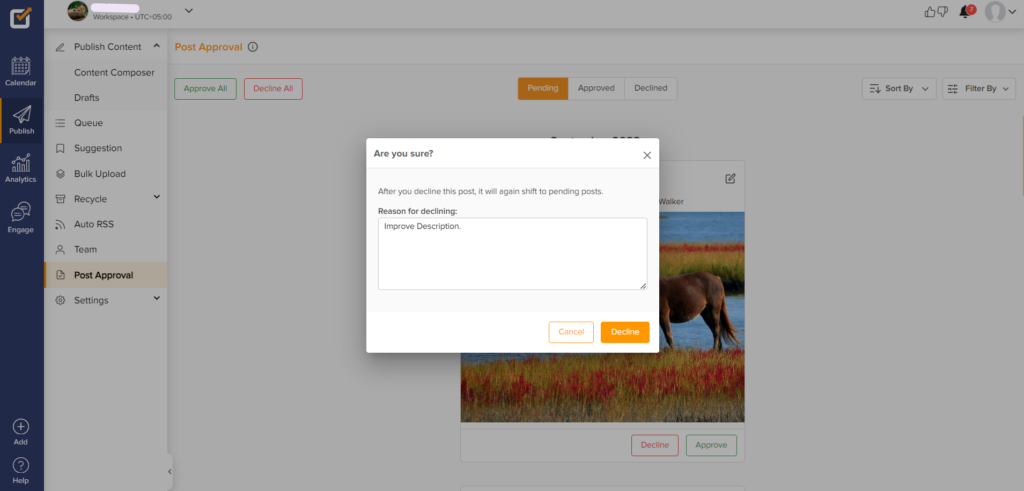
- After making the necessary changes to a declined post, it will be moved back to the Pending tab for the admin or owner to review and approve, awaiting approval.
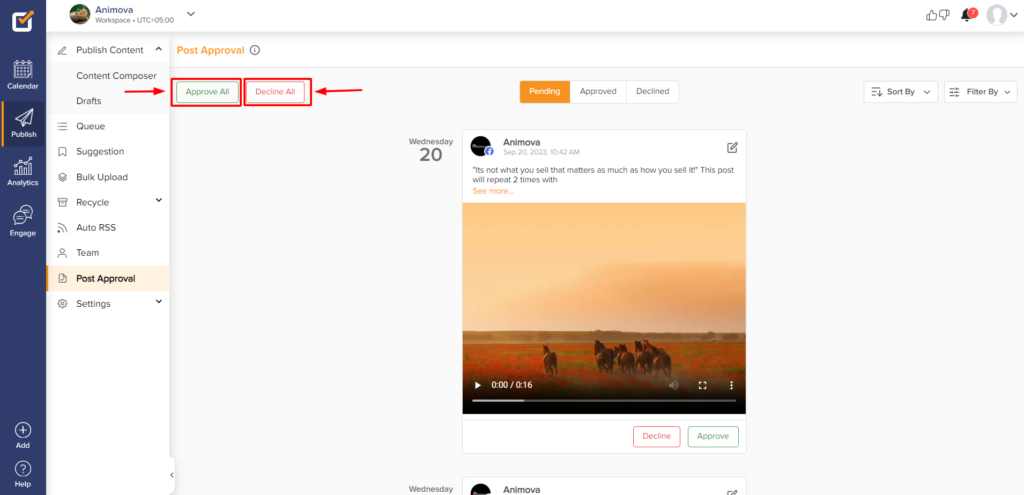
- If you want to approve/decline all the posts at once, you can select Approve All/Decline All buttons, respectively.
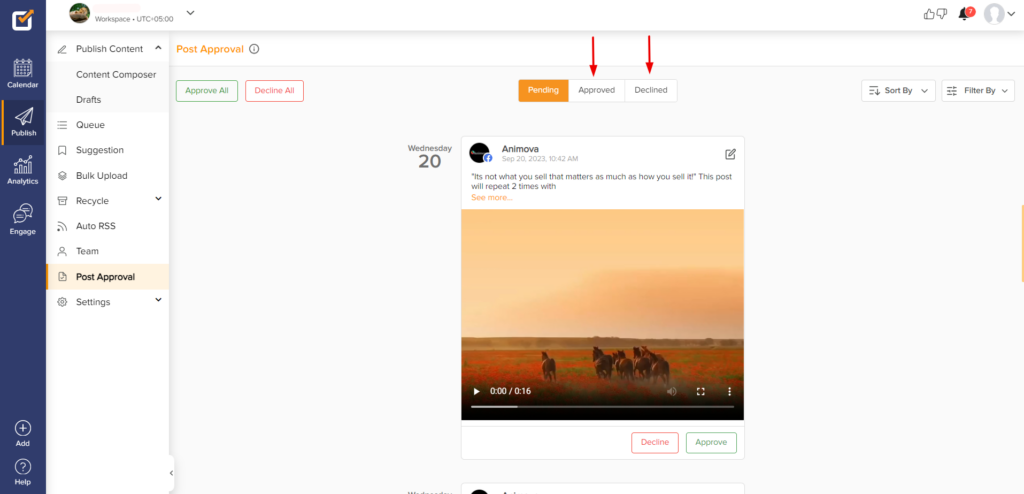
- If you want to view your previously ‘Approved’ and ‘Declined’ posts, you can view them by visiting their respective tabs at the top.
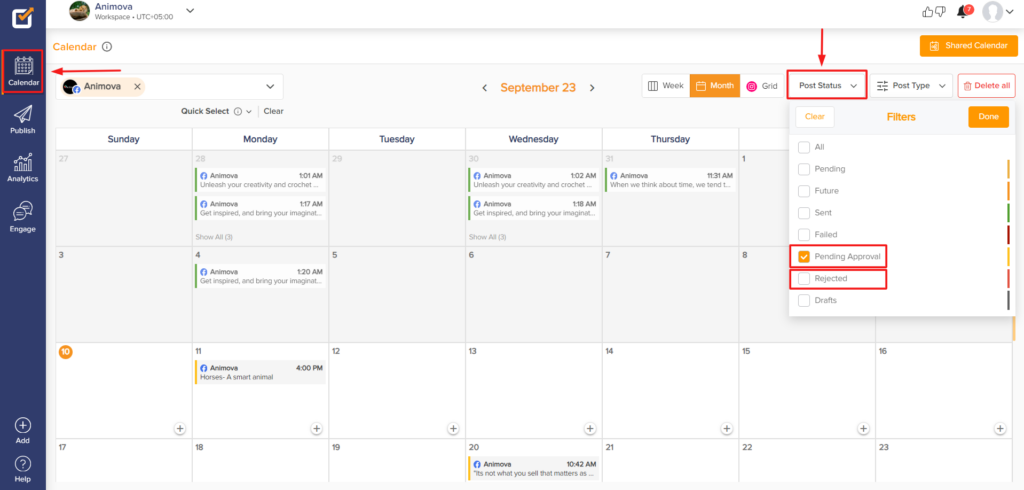
- You can also find your posts pending for approval in the calendar by clicking on the “Post Status” button. This feature allows you to filter and view posts based on their status, such as Pending approval and Rejected.
Please note: When a post is submitted for Post-Approval, and it does not receive an “Approved” or “Declined” status, it will remain in the Pending section until further action is taken.
Great! Now you know how Post-Approval works. 🙂
More of a visual learner? Check out this Tutorial on Social Champ’s Post Approvals feature!
Last modified: February 21, 2024